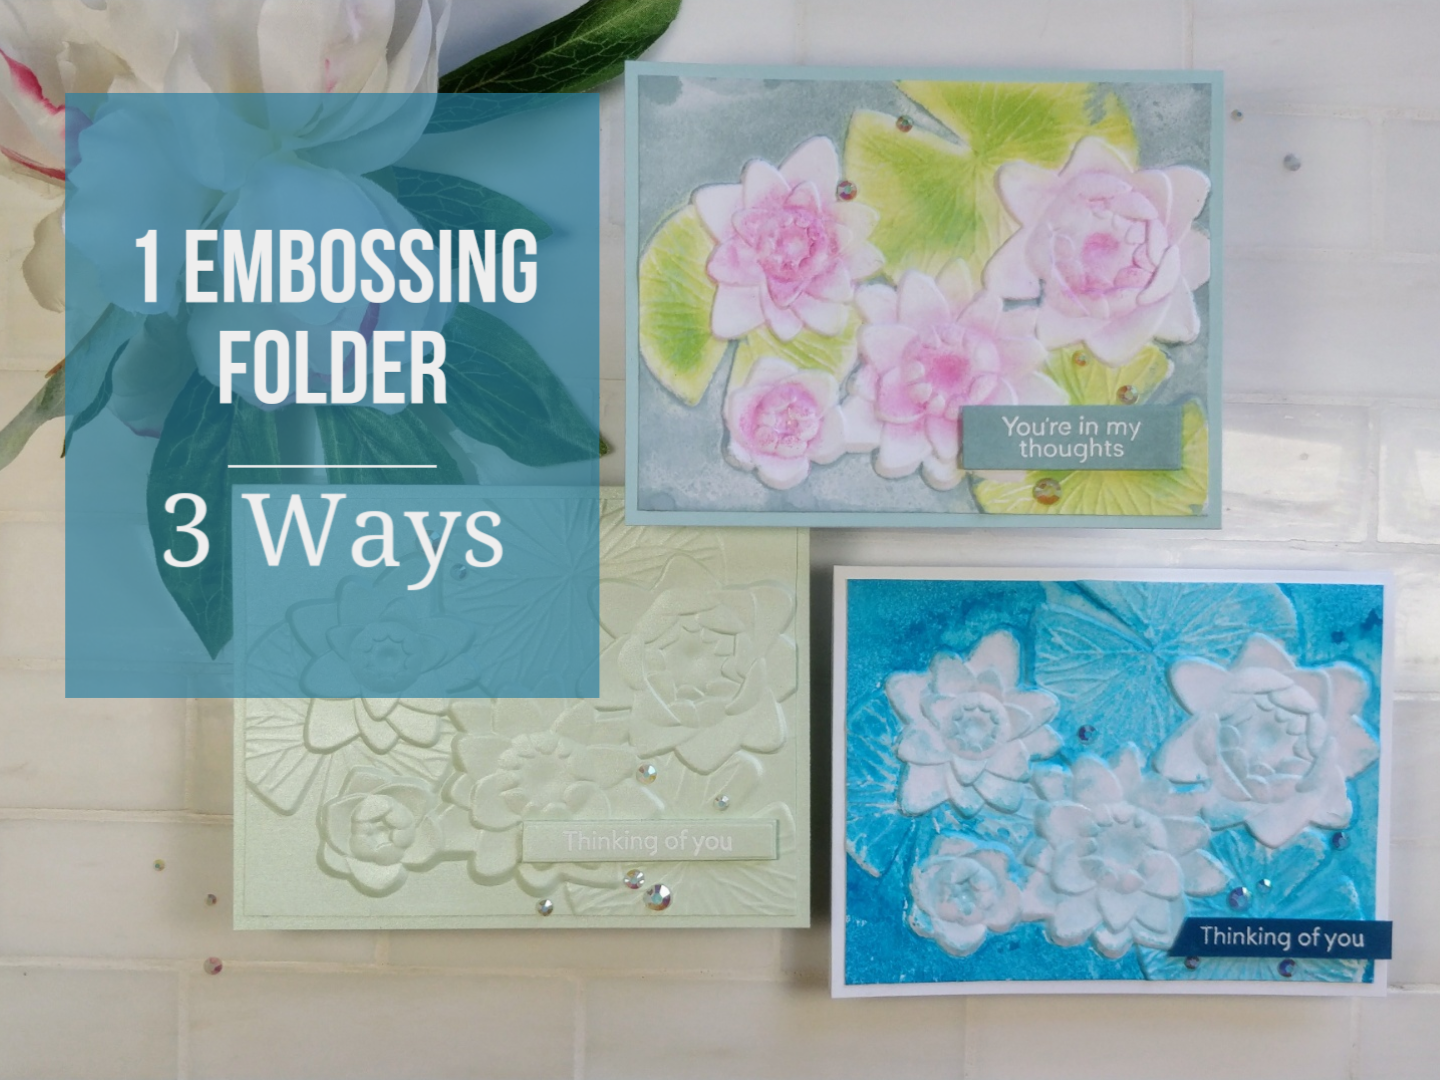
Ready for some embossing folder fun? Today, I’m sharing three ways to use the Water Lily 3D Embossing Folder from i-crafter.
Before we get started, let’s make a sandwich. Depending on the embossing folder you use, and your die cutting machine, you will have to play with the plates, and tabs or shims, to create the perfect sandwich. Most machines have recipe guides to help determine the layers you will need. Never force the plates through your machine. If your sandwich seems too thick to run through, adjust to make it thinner. If your sandwich runs smoothly through, but your paper comes out with tears or cracks, you might have too much pressure. Try removing a shim. If your paper comes out without much definition, try adding another shim.
Like most 3D embossing folders, this one is extra thick. They were invented after I bought my Big Shot, so there isn’t a recipe printed on my base plate. The sandwich for my machine is the base plate (open to tab 1), the folder with cardstock inside, and one single cutting plate on top. (Normally, my machine uses a top and bottom cutting plate, but this folder is thick enough to eliminate one.) Once I figured out the correct sandwich, I wrote it down on a post-it, and keep it with the folder for future reference. With all 3D embossing folders, you will be adding a lot more dimension than regular folders. Even with the right amount of pressure, you can get cracks in your paper. To help avoid that, lightly mist your paper with water before running it through.
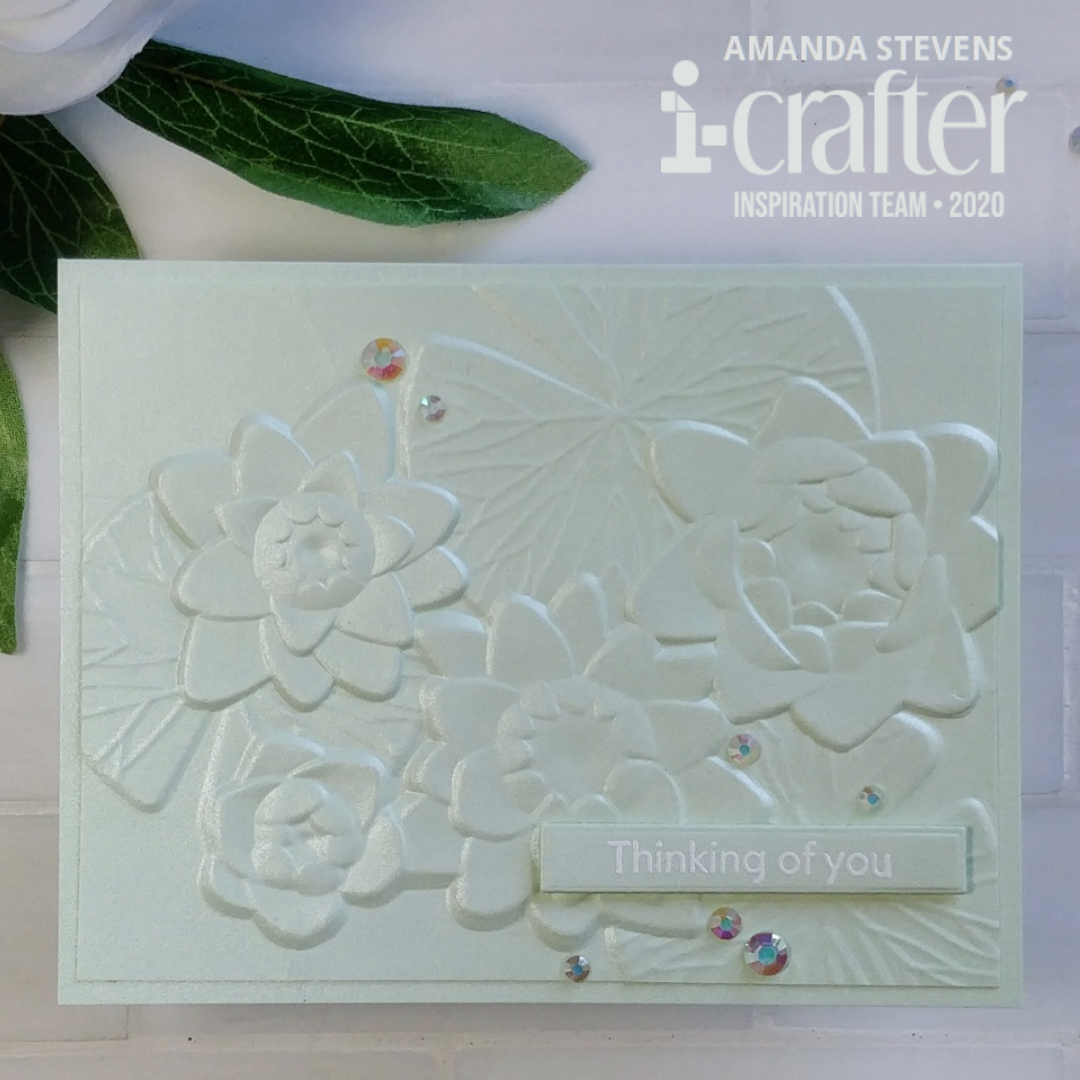
NO COLORING
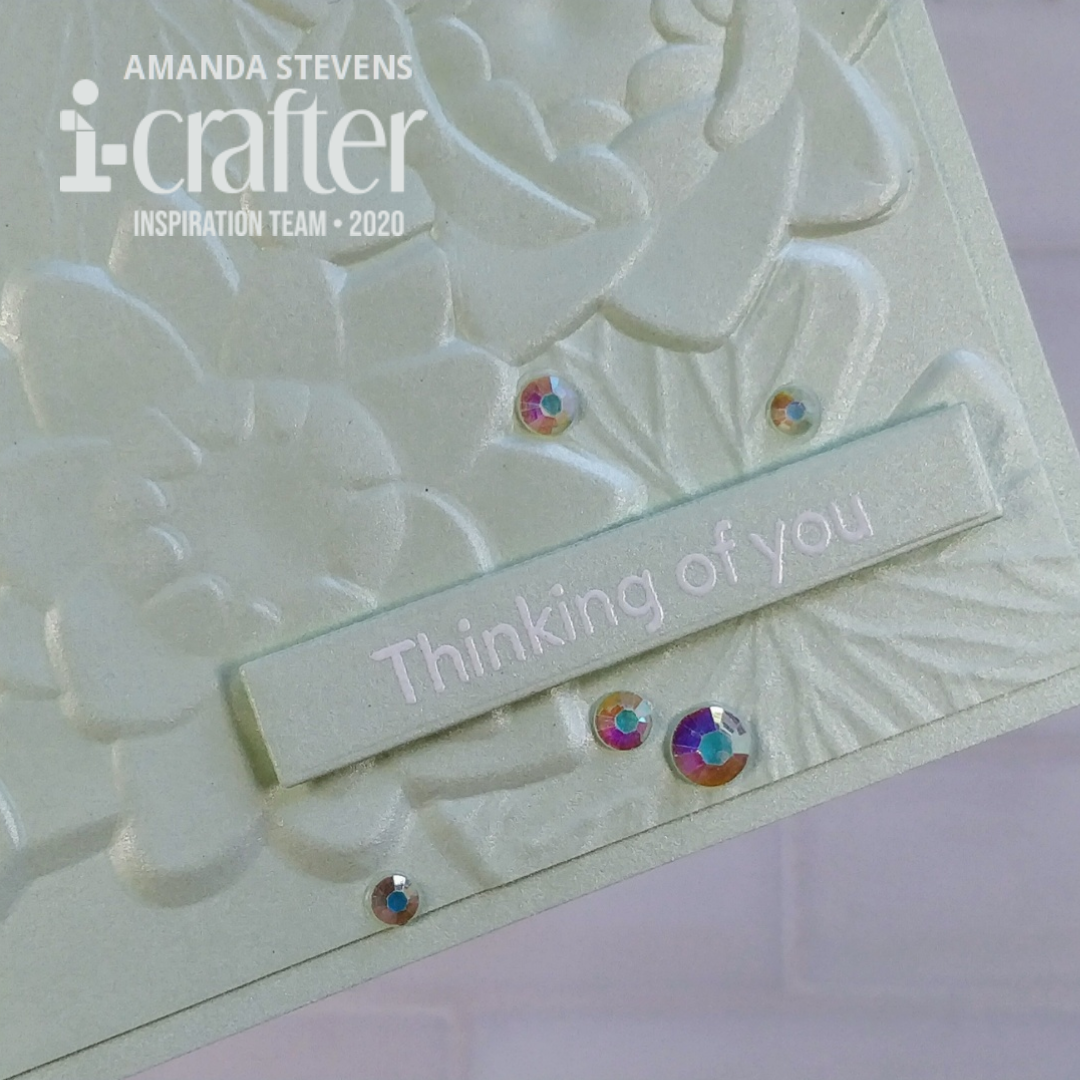
Once you know your sandwich recipe, it’s time to get started. The easiest way to use an embossing folder, is just to emboss the design on a white, or solid color cardstock panel. This will give you a tone-on-tone look. It’s clean, simple, classy, and FAST! I ran a pearl green cardstock panel through and trimmed it down to 4″ x 5¼.” Then I glued it to a card base made from the same paper. To finish the card, I heat embossed a sentiment from the Scattered Thoughts stamp set, and popped the strip up on the panel with foam tape. A few scattered gems add more sparkle.
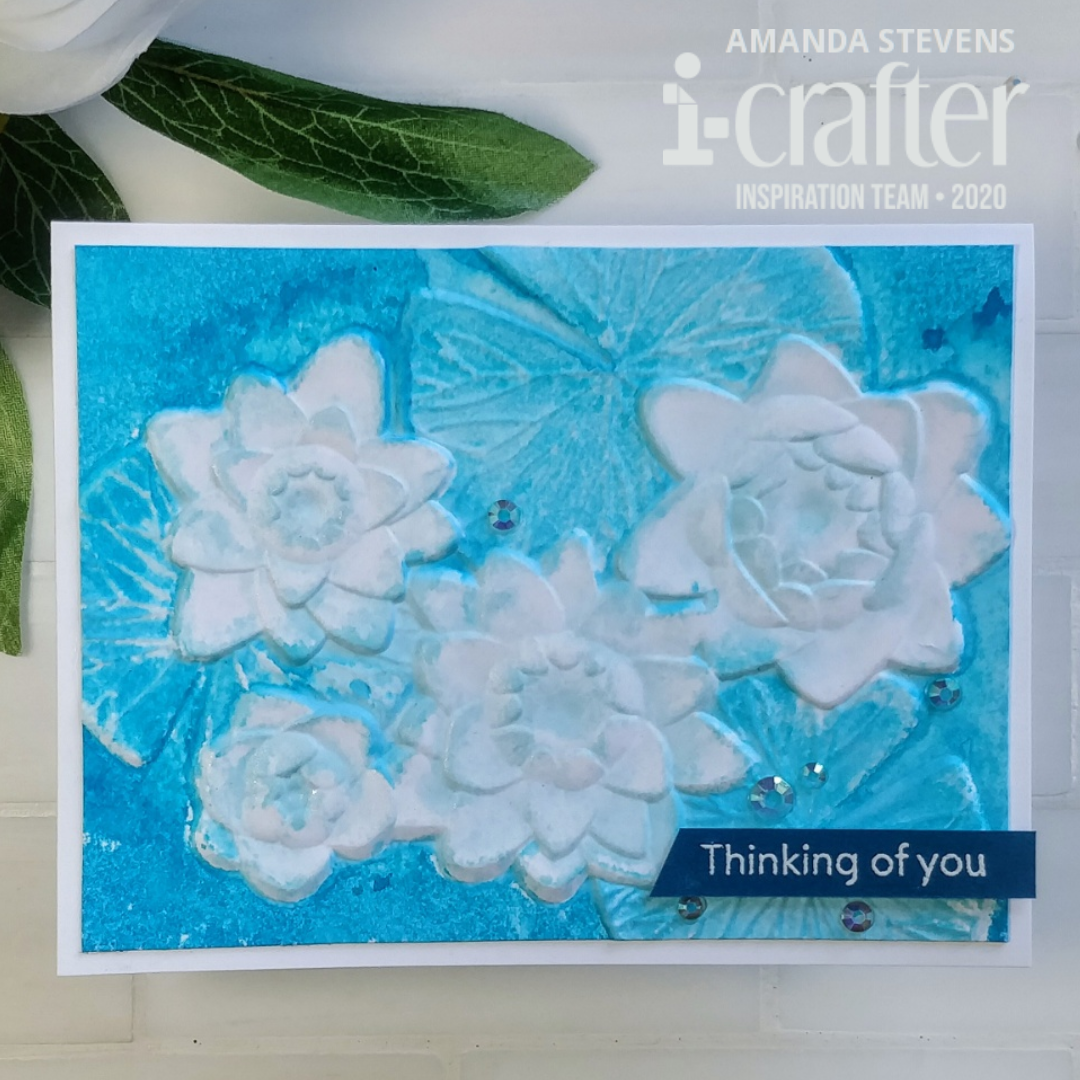
MONOCHROMATIC
To step things up, you can add some color to your embossing folder. Then, when you run your panel through, the color will transfer as it embosses. For my monochromatic card, I used four shades of blue Karin markers to color directly onto the embossing folder. Instead of misting my watercolor panel, I spritzed the folder with water. The moisture will still help prevent cracking, and by applying it to the folder, it allows the marker lines to soften. The result is a loose watercolor effect. Once the panel dried, I rubbed a bit of pearly white luster cream onto the high points of the flowers. I trimmed it down and mounted it, along with a sentiment strip and gems, just like the previous card. This card is quick and easy too, but you have to allow a few more minutes for dry time and clean up.
FULL COLOR
For a full color effect, you can add multiple colors. I suggest running your panel through multiple times though (once per color) for a cleaner result. It’s easy to line up the panel to run through again, but you might want to tape it in place, to prevent shifting. For this card, I lightly applied Picked Raspberry ink to the flower centers with an i-brush blending brush. After lightly misting it, I ran my watercolor panel through and cleaned the folder. Then, I applied Twisted Citron and Mowed Lawn ink to the leaves, cleaning up any stray green ink from the flower and water areas. I misted the folder, and ran the panel through again. For the water areas, I applied Speckled Egg ink to the folder. Since the water layer is the highest part of the folder, it was faster to swipe my pad across the folder, instead of transferring the ink with a brush. I misted the folder and ran my panel through a third time. After it dried completely, I assembled the card just like the previous one. This card took a bit longer, since I had to run it through several times, cleaning the folder in between. It was still faster than coloring a floral image this size though.
 Have you played with embossing folders? What is your favorite way to use them? I hope this inspires you to pull yours out, or give one a try. I love the raised texture, especially from the Water Lily 3D Embossing Folder; it’s quite stunning in person.
Thanks for stopping by today. You can find the sister post to this article on the i-crafter blog. Head on over for more inspiration! I’ll be back again soon with another fun card to share. And keep an eye out on Sunday, for a special guest designer popping it!
This site uses affiliate links whenever possible (at no additional cost to you), but only for products I actually use and love.
