
Hey crafty friend, we’re still celebrating the new release from The Rabbit Hole Designs! If you are a fan of the caffeinated series, you’re going to love the three new critters. My card today features the Caffeinated Meerkat. I couldn’t resist drawing in a simple scene behind him. I’ll talk you through the steps…
To start, I stamped the Meerkat in Warm Glow ink (so I could color him no-line style). I like to color from the background to the foreground, so I drew in my scene behind him first. I simply drew two wavy lines with a Sepia Copic Multiliner Pen (to coordinate with the Warm Glow ink – substitute a black pen if you stamp with black ink). Using the grass from the new Butterfly Kiss Stamp Set, I stamped it in the areas on the lower portion (the foreground). To reduce the scale, I used my multiliner pen again to draw smaller grass tufts in the areas further away from him (background). Then it was time to color. Starting with the sky, I blended several shades of blue Copic markers, lighter at the horizon and darker at the top. Meerkats tend to blend into their surroundings, so I used a lot of the same E colors for the ground and my critter. After deepening the shadows on the meerkat with colored pencils, and adding white gel pen highlights, the scene felt a little plain. Too much of the same color. Plus, my meerkat was right in the center – kind of boring. So I stenciled on some clouds with white ink, and then sketched in an acacia tree toward the upper left corner. It’s just some shaky brown lines, and green dots at the top. Acaia trees tend to have a wide, flat canopy. They are iconic, and simple to draw. (If you feel like your tree is too billowy at the top, just spread the canopy out wider, and add a few more branches underneath.)
The tree really helped to balance the scene and add more color. To keep your eye moving in a diagonal, I heat embossed a sentiment from Perfectly Blended in the lower right corner. I trimmed the panel down to 3½” x 4¾” then matted it onto a slightly larger white panel. Before mounting it to a kraft A2 card base with foam tape, I glued a strip of polka dot pattern paper on the left edge. (That helps bring your eye to the left corner to start.) A few gold gems near the sentiment keep your eye traveling and draw attention to the sentiment. What do you think?
[one_half]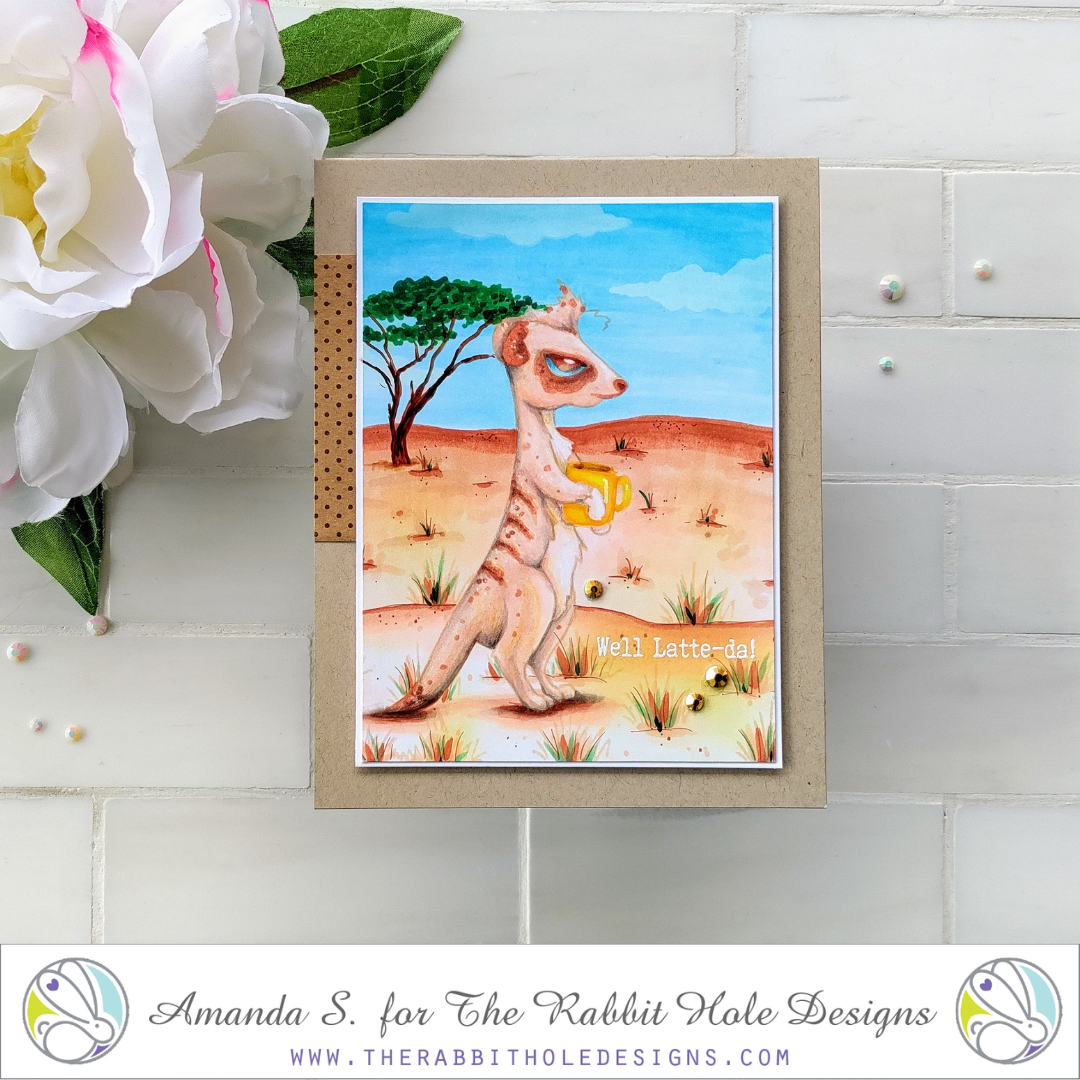 [/one_half]
[one_half last]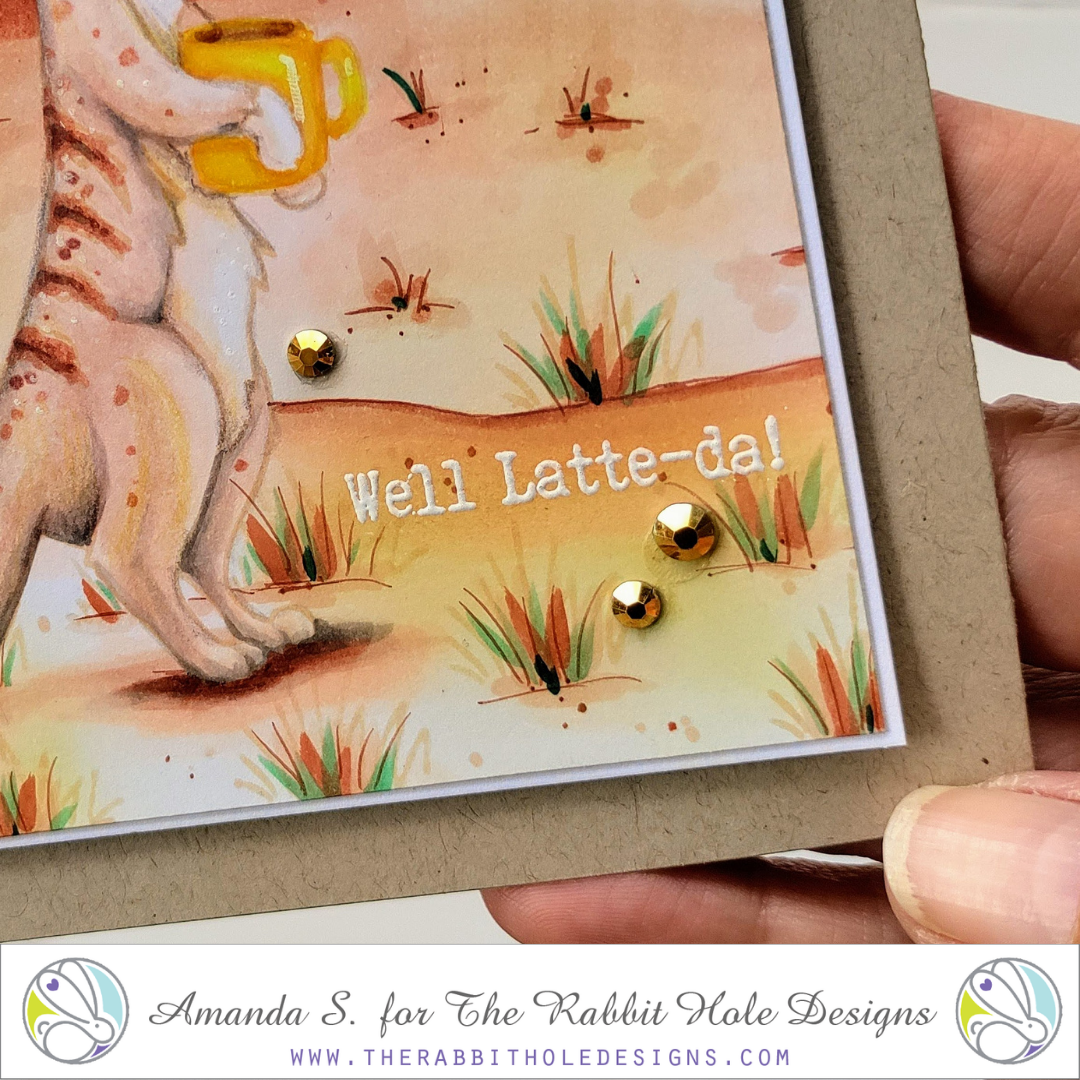
[/one_half]
Just a quick tip… the background behind the sentiment wasn’t dark enough to make it pop, so I blended a little brown ink on top, then buffed it off. I didn’t actually add any ink to my brush, just used the residual ink left from the last time I used it. (It’s handy to keep a set of brushes for different colors.) That added enough contrast, but it didn’t change the look of the background. You can do this too, if you find your embossed sentiments aren’t standing out enough.
I hope you are inspired to draw a scene of your own for the new Caffeinated Critters! Want more inspiration? Hop along with us…
The Rabbit Hole Designs
Amanda
Jenn
Joy
Kelly
Kim
Lauren
Tangii
Terra
Von Marie
GIVEAWAYS
To celebrate the new release, The Rabbit Hole Designs is giving away two savings vouchers; one to a lucky Instagram Follower, and one to a lucky Facebook Fan Page follower. Winners will be chosen at random from the comments left on the Instagram post, and from comments on the Fan Page post. Make sure to head on over to Instagram and Facebook and look for the giveaway posts. Comment by 11:59 p.m. PST on May 27, 2021 to enter. Winners will be announced on The Rabbit Hole Designs blog on May 28th.
Thanks so much for stopping by today! Did you notice both of my cards this week are A2 sized? I promised I wouldn’t only make mini-slimlines. I’ll be back soon with more fun cards to share. See you then!
This site uses affiliate links whenever possible (at no additional cost to you), but only for products I actually use and love.

WOW, your scene is just amazing. I LOVE how you made the grass…with various colors. And the tree. What a great, authentic scene…