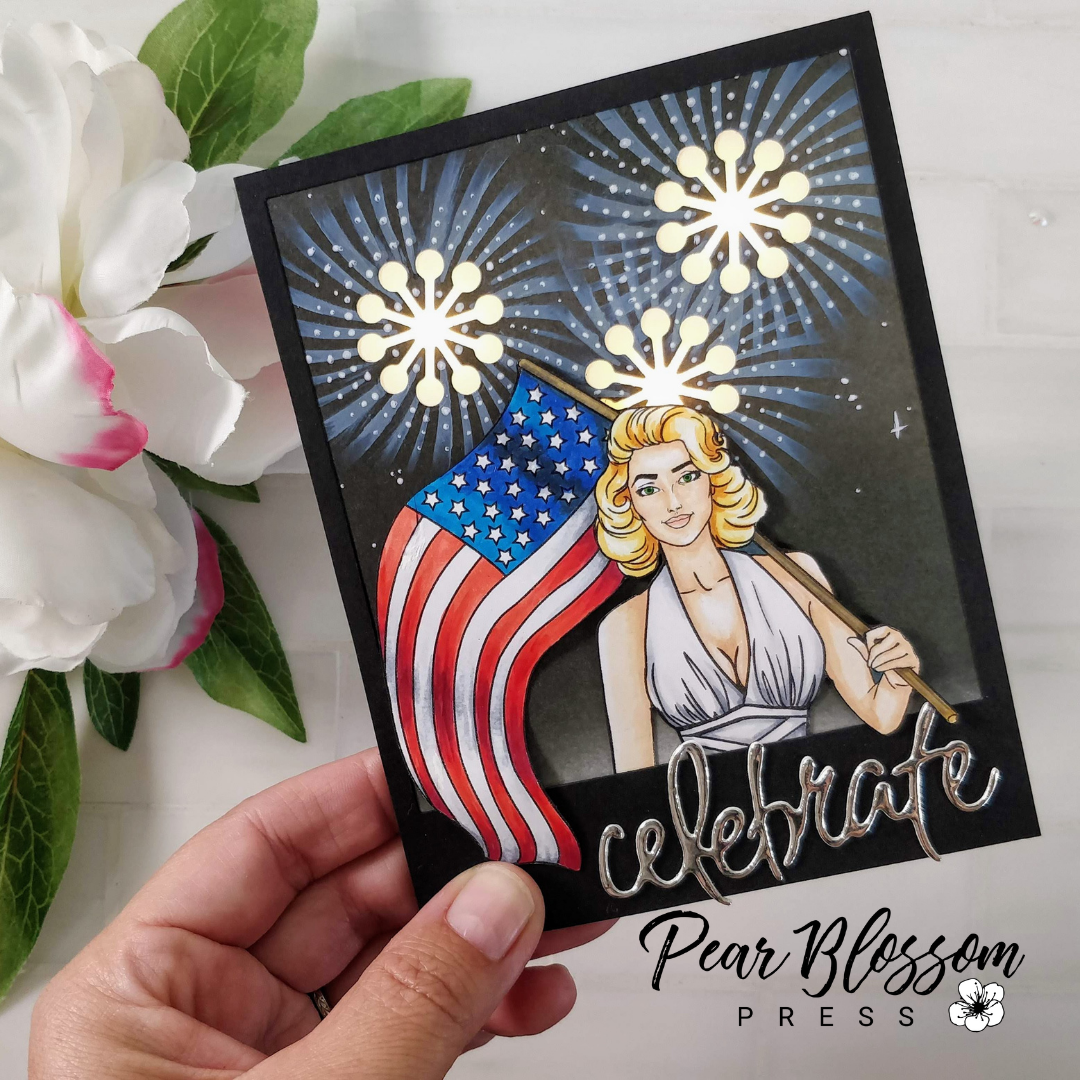
I know it’s a day early, but I wanted to show you a fun card I made for the 4th of July. I don’t normally send cards for the 4th, but when I saw the busty lady holding a flag, I knew I needed to make this card for my father-in-law. Lol, he’s almost 93, but he still appreciates a beautiful woman. Plus, the fireworks behind her actually light up, so he’s really going to love this card. Check it out…
[one_fifth][/one_fifth]
[three_fifth]
[/three_fifth]
[one_fifth last][/one_fifth]
To make this card, I started by Copic coloring the Free and Brave Sassy Girl from Sassy and Crafty, then cutting her out with my Scan N’ Cut. Notice there is no white border around her? I knew she was going on top of a night sky, so I cut right along the line, and outlined the cut edge with a black marker. Because her other arm and waist fade off, I decided to cut a black Polaroid style frame to tuck her behind. I kept it narrow around the top and sides, to allow a lot of sky to show, and left enough room at the bottom for a sentiment. I embossed the word PUSH with white powder on the left, and glued the silver die cut word CELEBRATE in place.
To create a night sky, I blended teal ink onto a white panel. Then I blended grey and black inks on top. (The teal is almost completely lost, so I would skip that step next time.) I purposely didn’t carry the ink all the way down to the bottom of the panel, because I wanted to have a light glow in the horizon behind her. (I imagine her watching fireworks at a park or stadium, with hazy lights behind her.)
For the fireworks, I was inspired by a card my friend, Lynda Kanase, made. She used a flower to create the fireworks and it looked awesome! I hunted through my dies for a flower center that looked like the right shape. The one I chose is from the i-crafter Oval Box Pops set, but I’m sure you have one that will work. I positioned the die in the sky and cut it out three times. To keep one focal point with the girl and the fireworks, I made sure to cut one right behind her head. If I had cut it higher, it would have split your attention, and created competing focal points, rather than one cohesive scene. To enlarge the fireworks and have them fill the sky, I blended white ink through the Comic Book stencil. With a white gel pen, I added dots to the rays and then a few stars (dots and crosses) in the sky. Then, I flipped the panel over and glued vellum behind the holes. This will help spread out the light from my EZ-Lights.
In the photos below, you can see that I taped an EZ-Light in place, with the LEDs centered for the fireworks, and the battery in the lower left corner. I used a black card base to match the rest of the card, but that would have make the vellum look really dark when the lights aren’t on, so I trimmed a piece of silver paper to fit, poked holes for the lights and glued it in place. (White paper would have worked too, but I had the silver out for the sentiment, and figured it might reflect more light.) You can see in the second picture that when I push the button, I get three dots of light. If I glued the panel right on top, I would’ve had three little points of light, rather than the whole cutout glowing. To fix that, I needed to build a box for the light to spread out in before it reached the vellum. So I added a layer of double thick foam tape around the edges. (That also happens to be the same height as the battery pack.)
[one_half]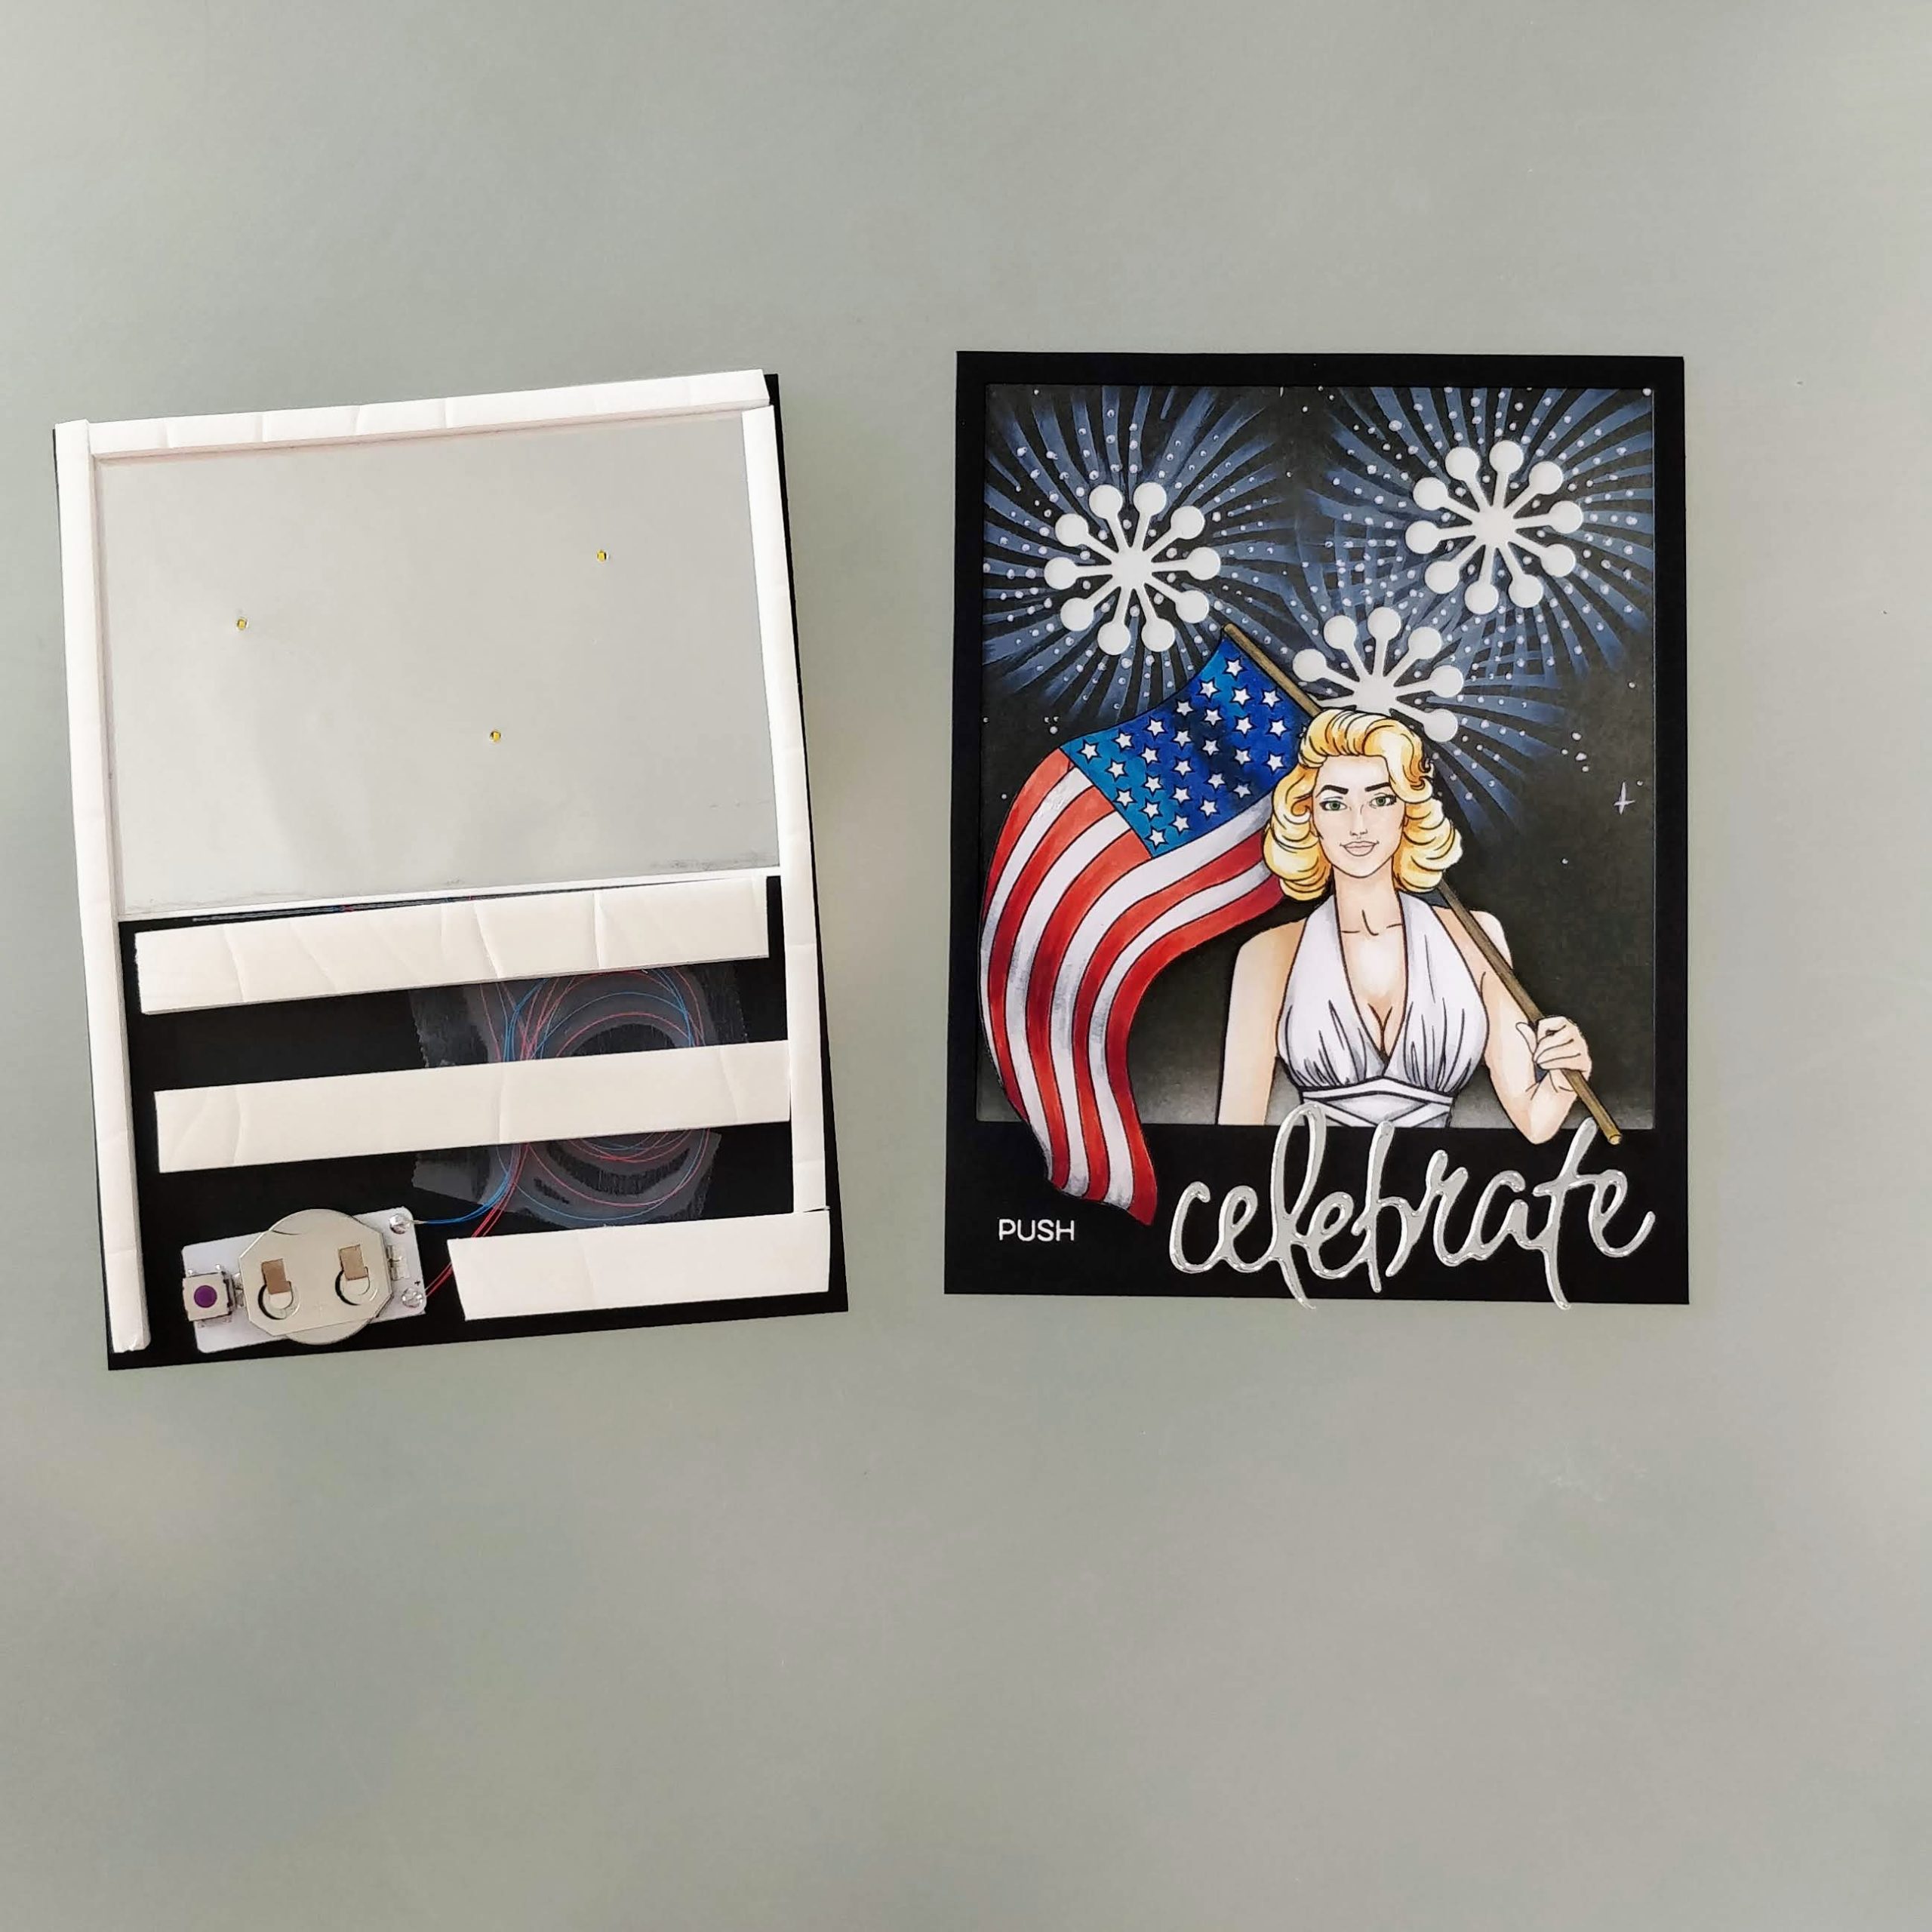 [/one_half]
[one_half last]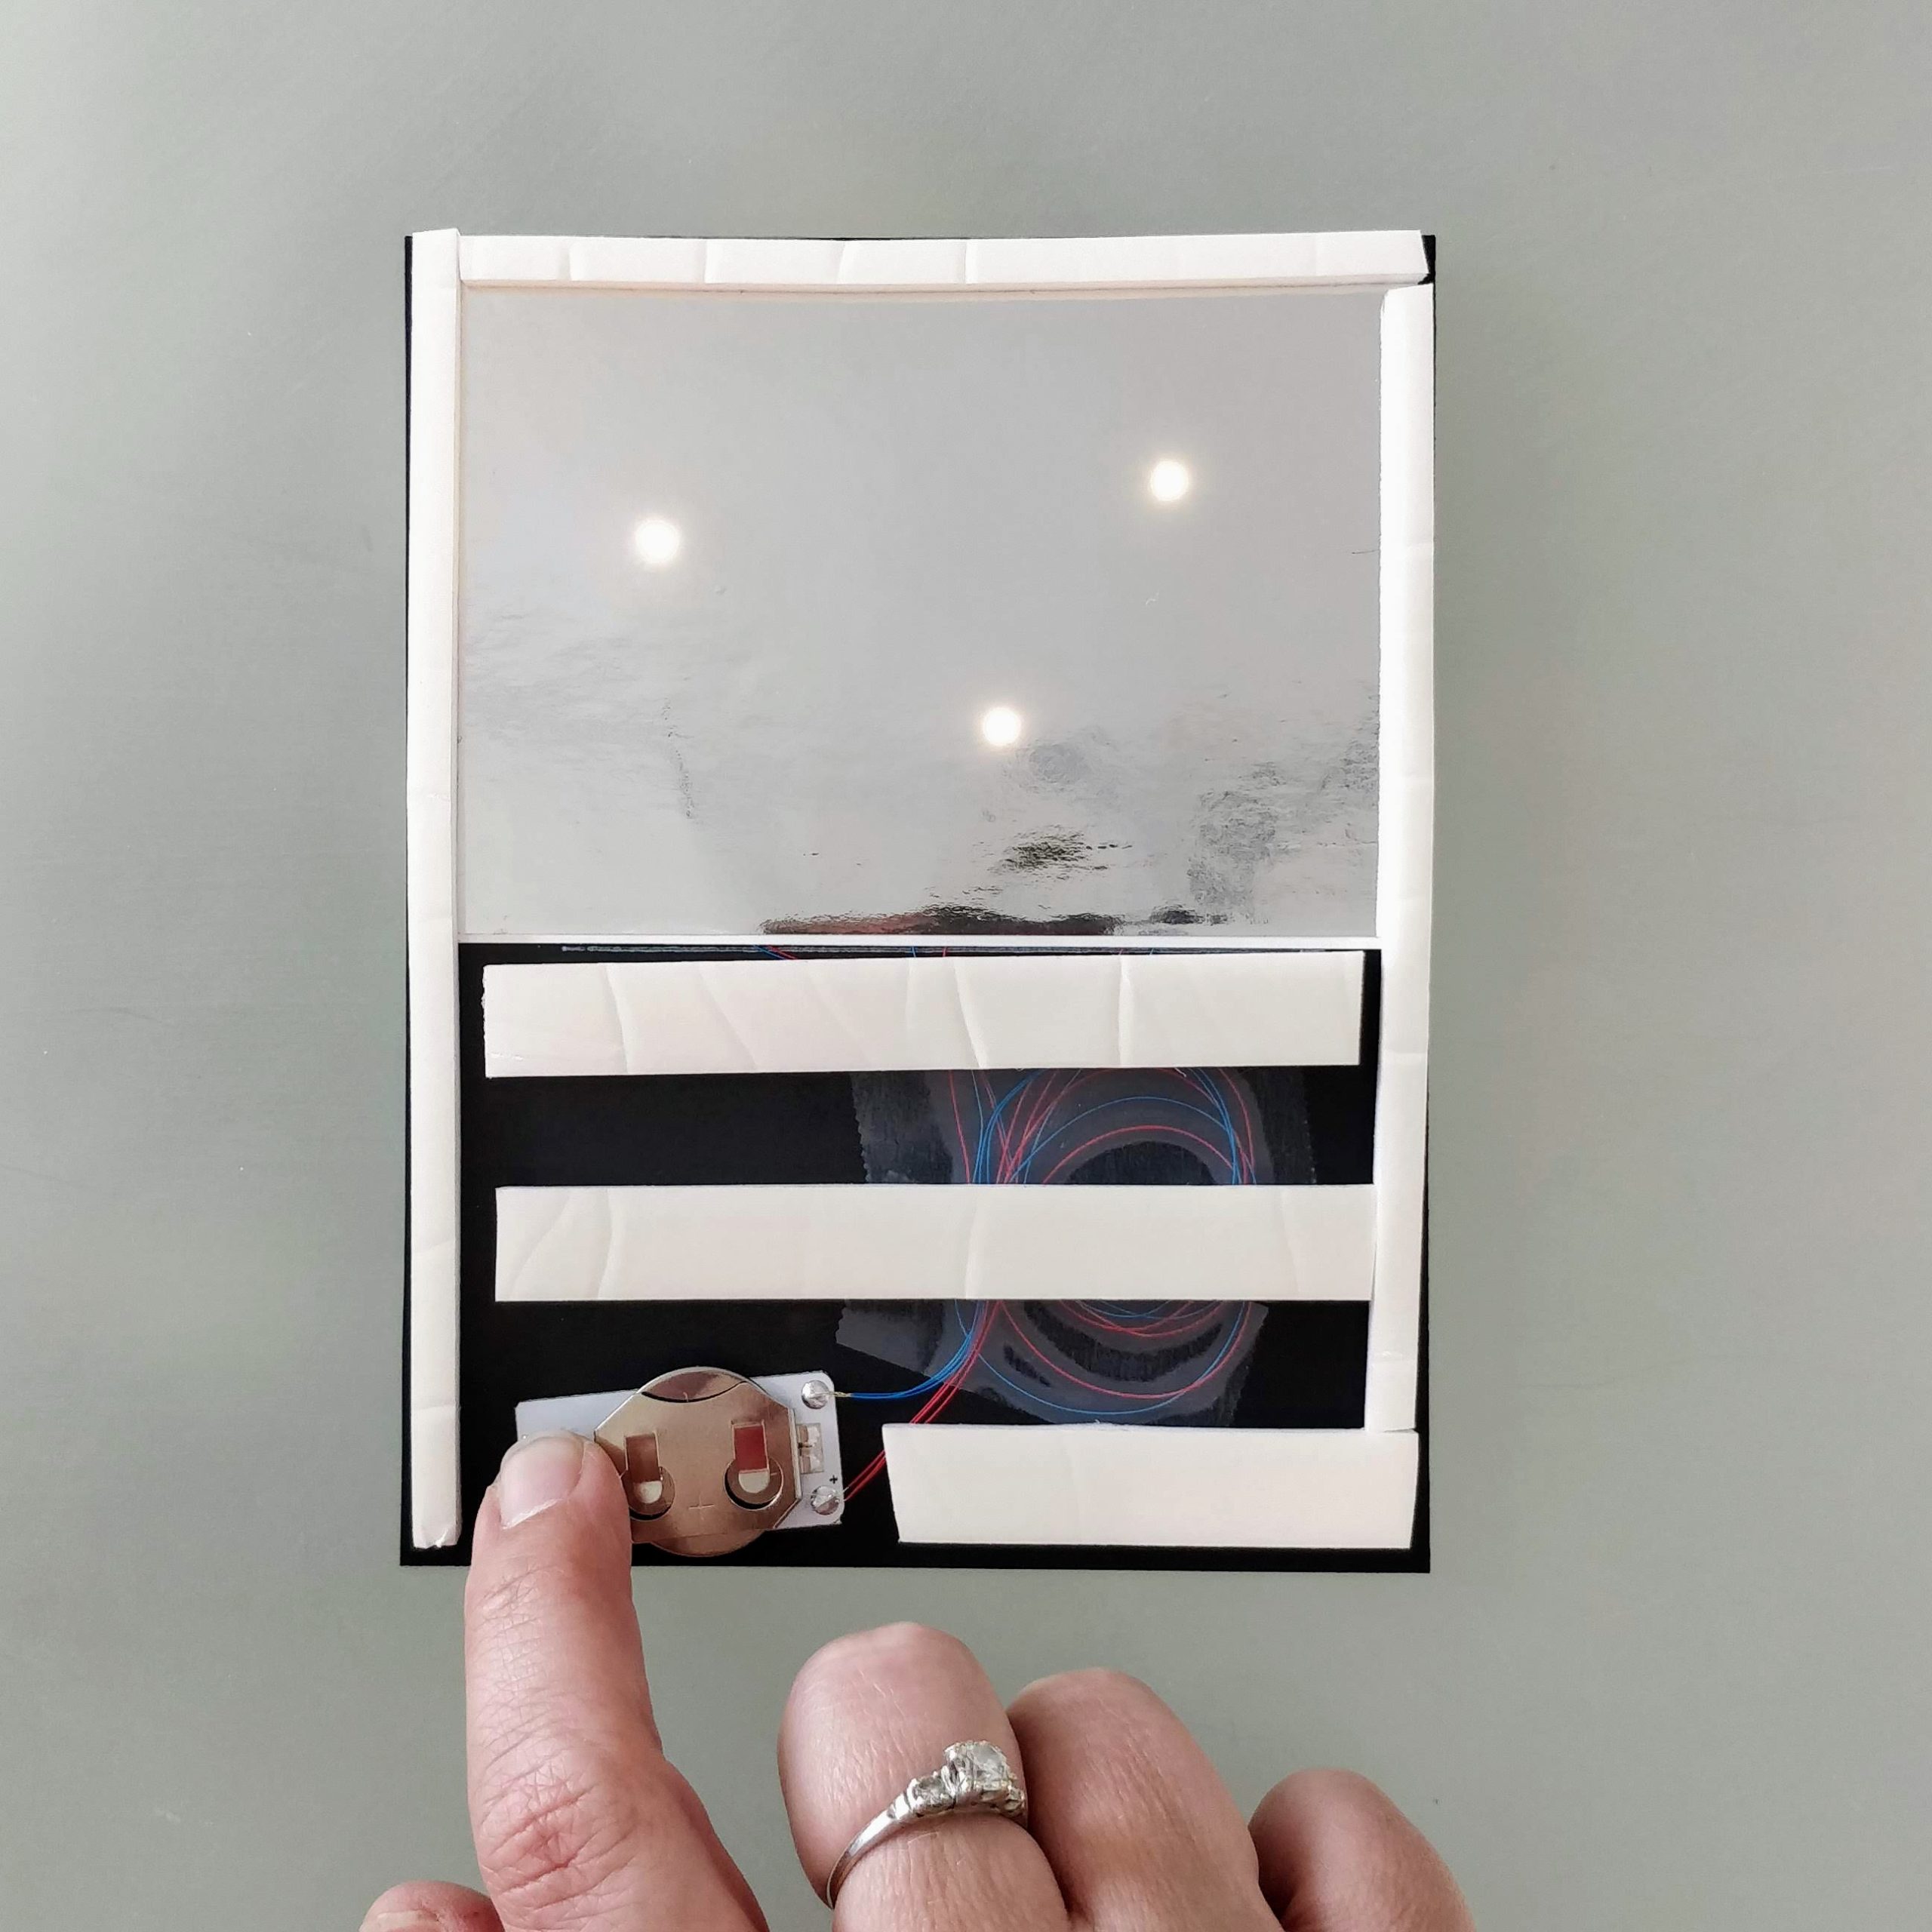 [/one_half]
When I adhered the top layer, the lights make the entire cutout area glow!

As a final finishing touch, I used a black marker to color the white foam that was visible from the sides of the card. It only took a minute, and it really made a difference.
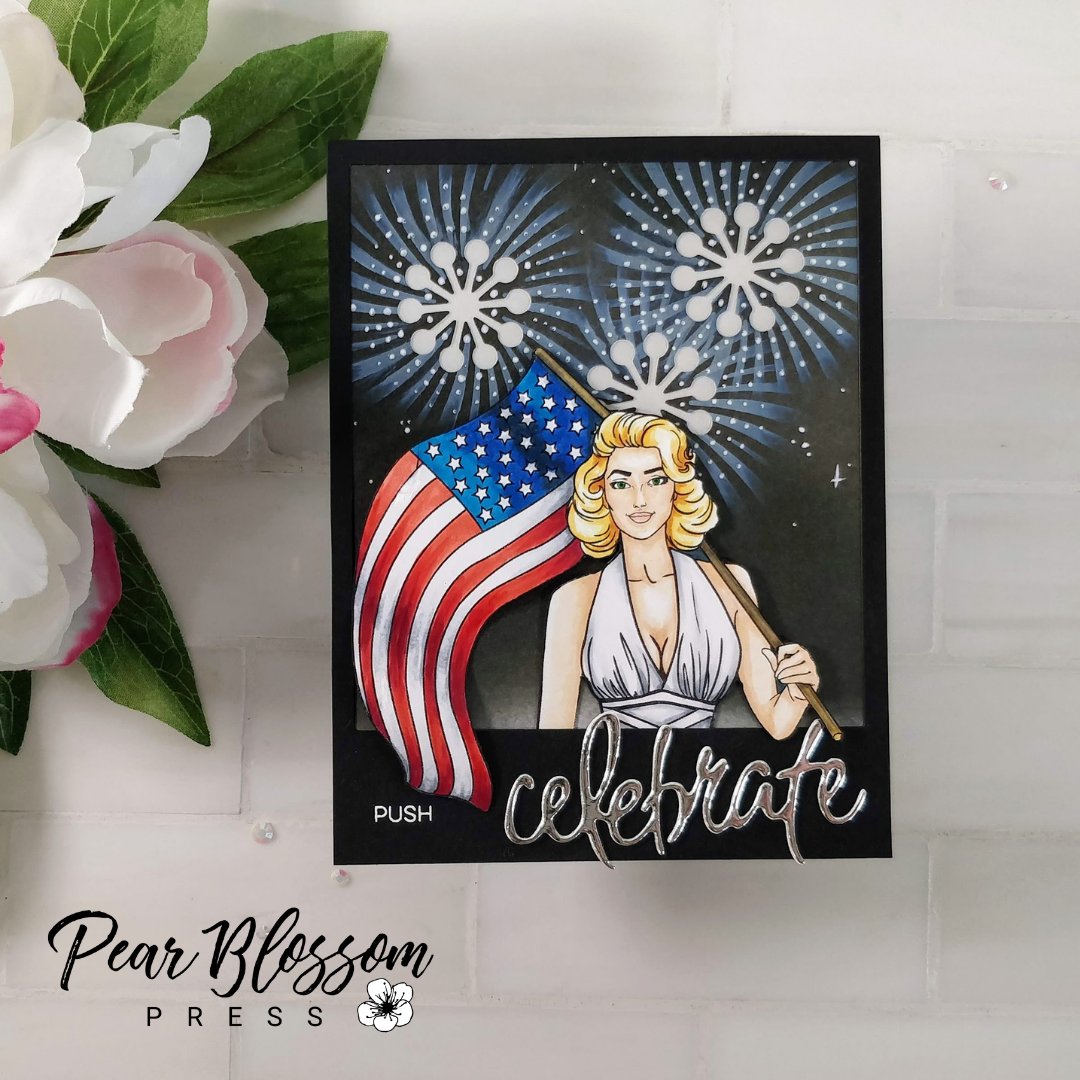
What do you think? No glitter, but plenty of shine from the silver sentiment, and of course the EZ-Lights! I know my father-in-law is going to love it! Lol, if I’d colored her as a brunette, my dad would have tried to call dibs.
Thanks for stopping by today. For those of you celebrating, I hope you have a safe and happy 4th of July weekend! Micah and I plan to put up a shed in the backyard today, but tomorrow, we’re going on a date before fireworks! Remember, no Crafternoon tomorrow. I’ll be back on Monday with another fun Christmas card to share. See you then!
This site uses affiliate links whenever possible (at no additional cost to you), but only for products I actually use and love.

Great card. The flag is one of the loveliest renditions I have seen and of course E-Z lights make this card as well as any others they are included on! Glad to see you made good use of the Pear Blossom Press white gel pen which as I told Micah and others on Magical Live is best product to come out in a long time. As you know, my garbage can is full of previous brands!