Hey friends! It’s Amanda Wilcox, from Twiddler’s Nook, and I’m super excited to be back with a second card guest designing for Pear Blossom Press! Today I have a card featuring some awesome Lawn Fawn products and the Pear Blossom Press EZ Lights!
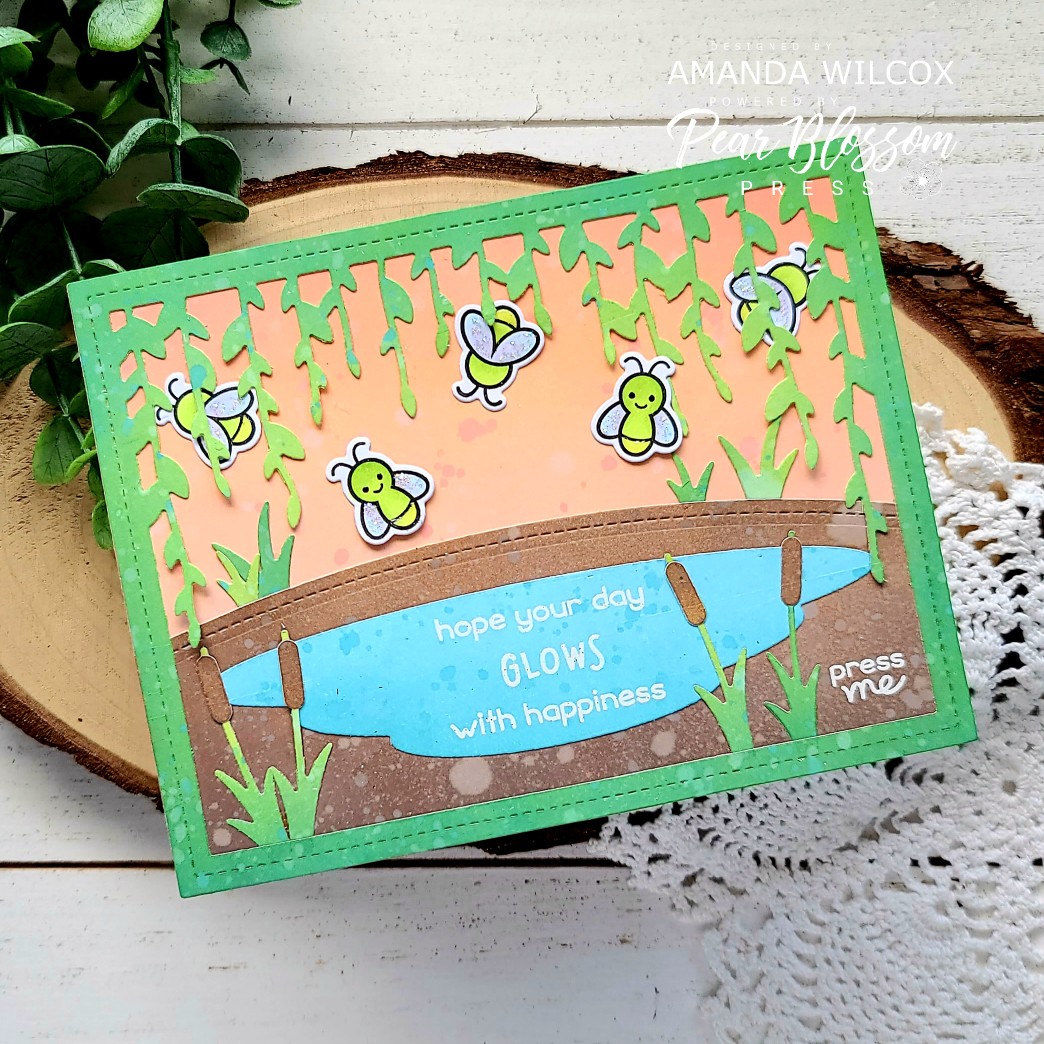
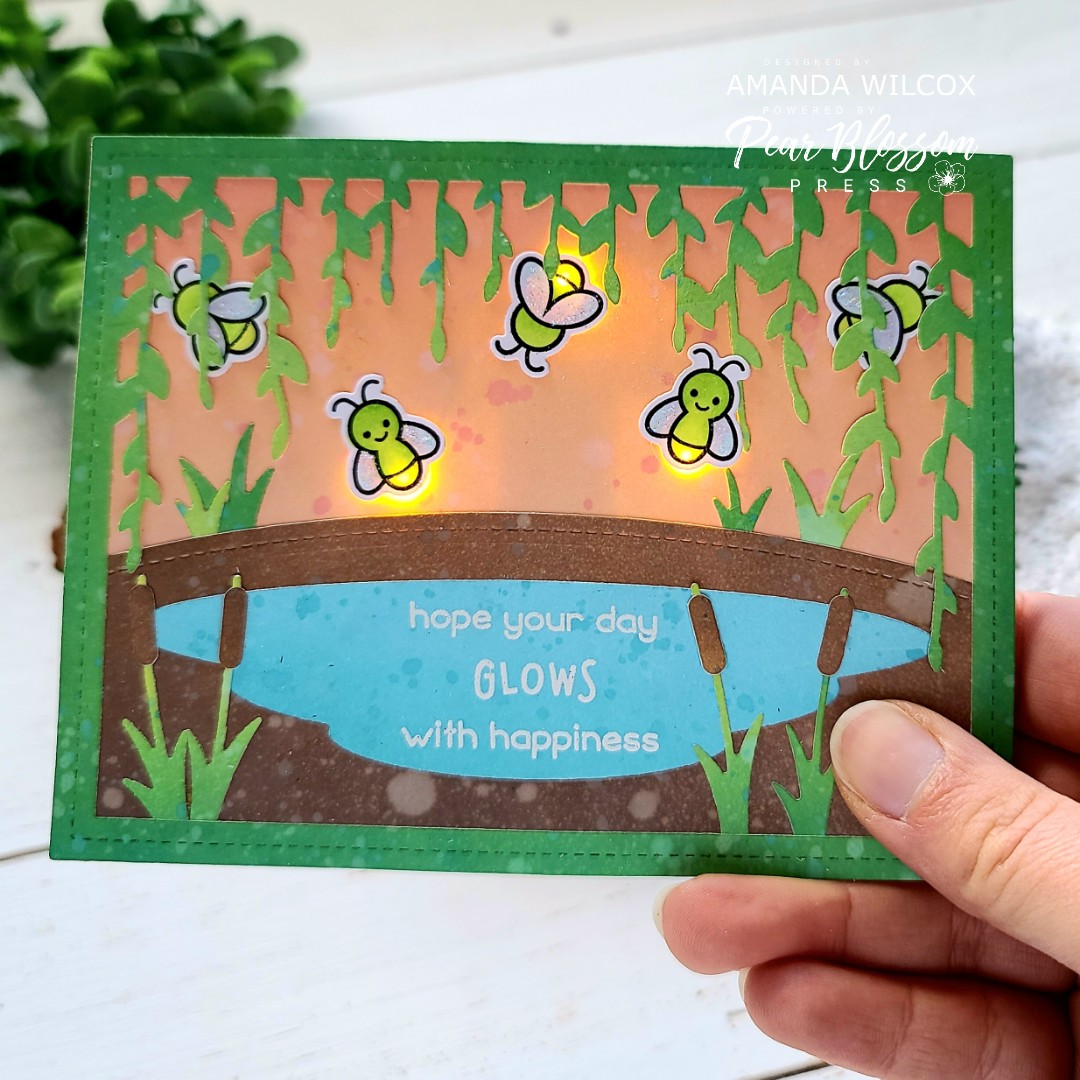
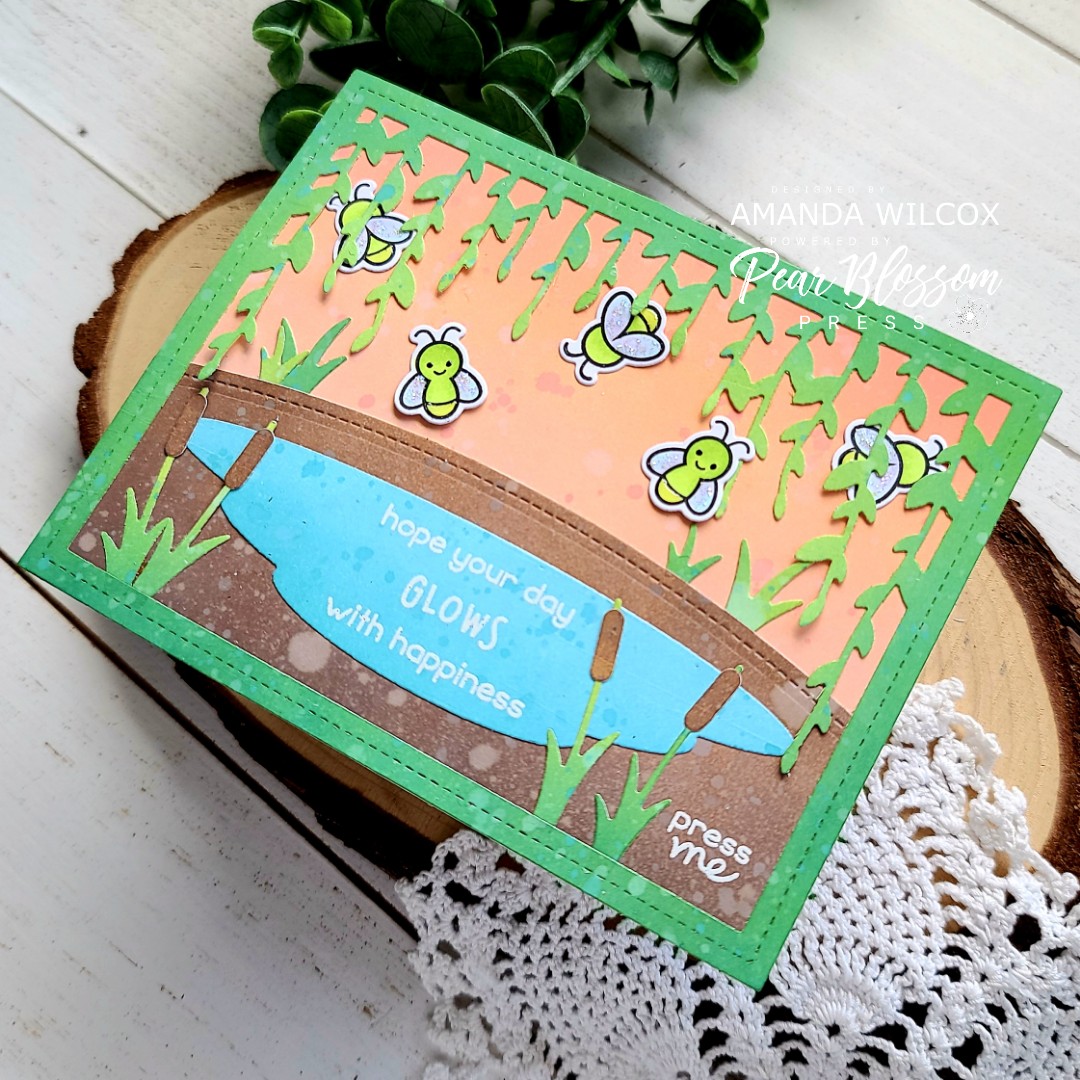
Here’s a look at the finished card before we dive into the process of creating it. Isn’t it just too cute! We don’t have fireflies where I live but I always thought it would be a really cool thing to be able to sit outside and watch them at night. So, I made a card thinking of that while I got inky. Let’s get started!
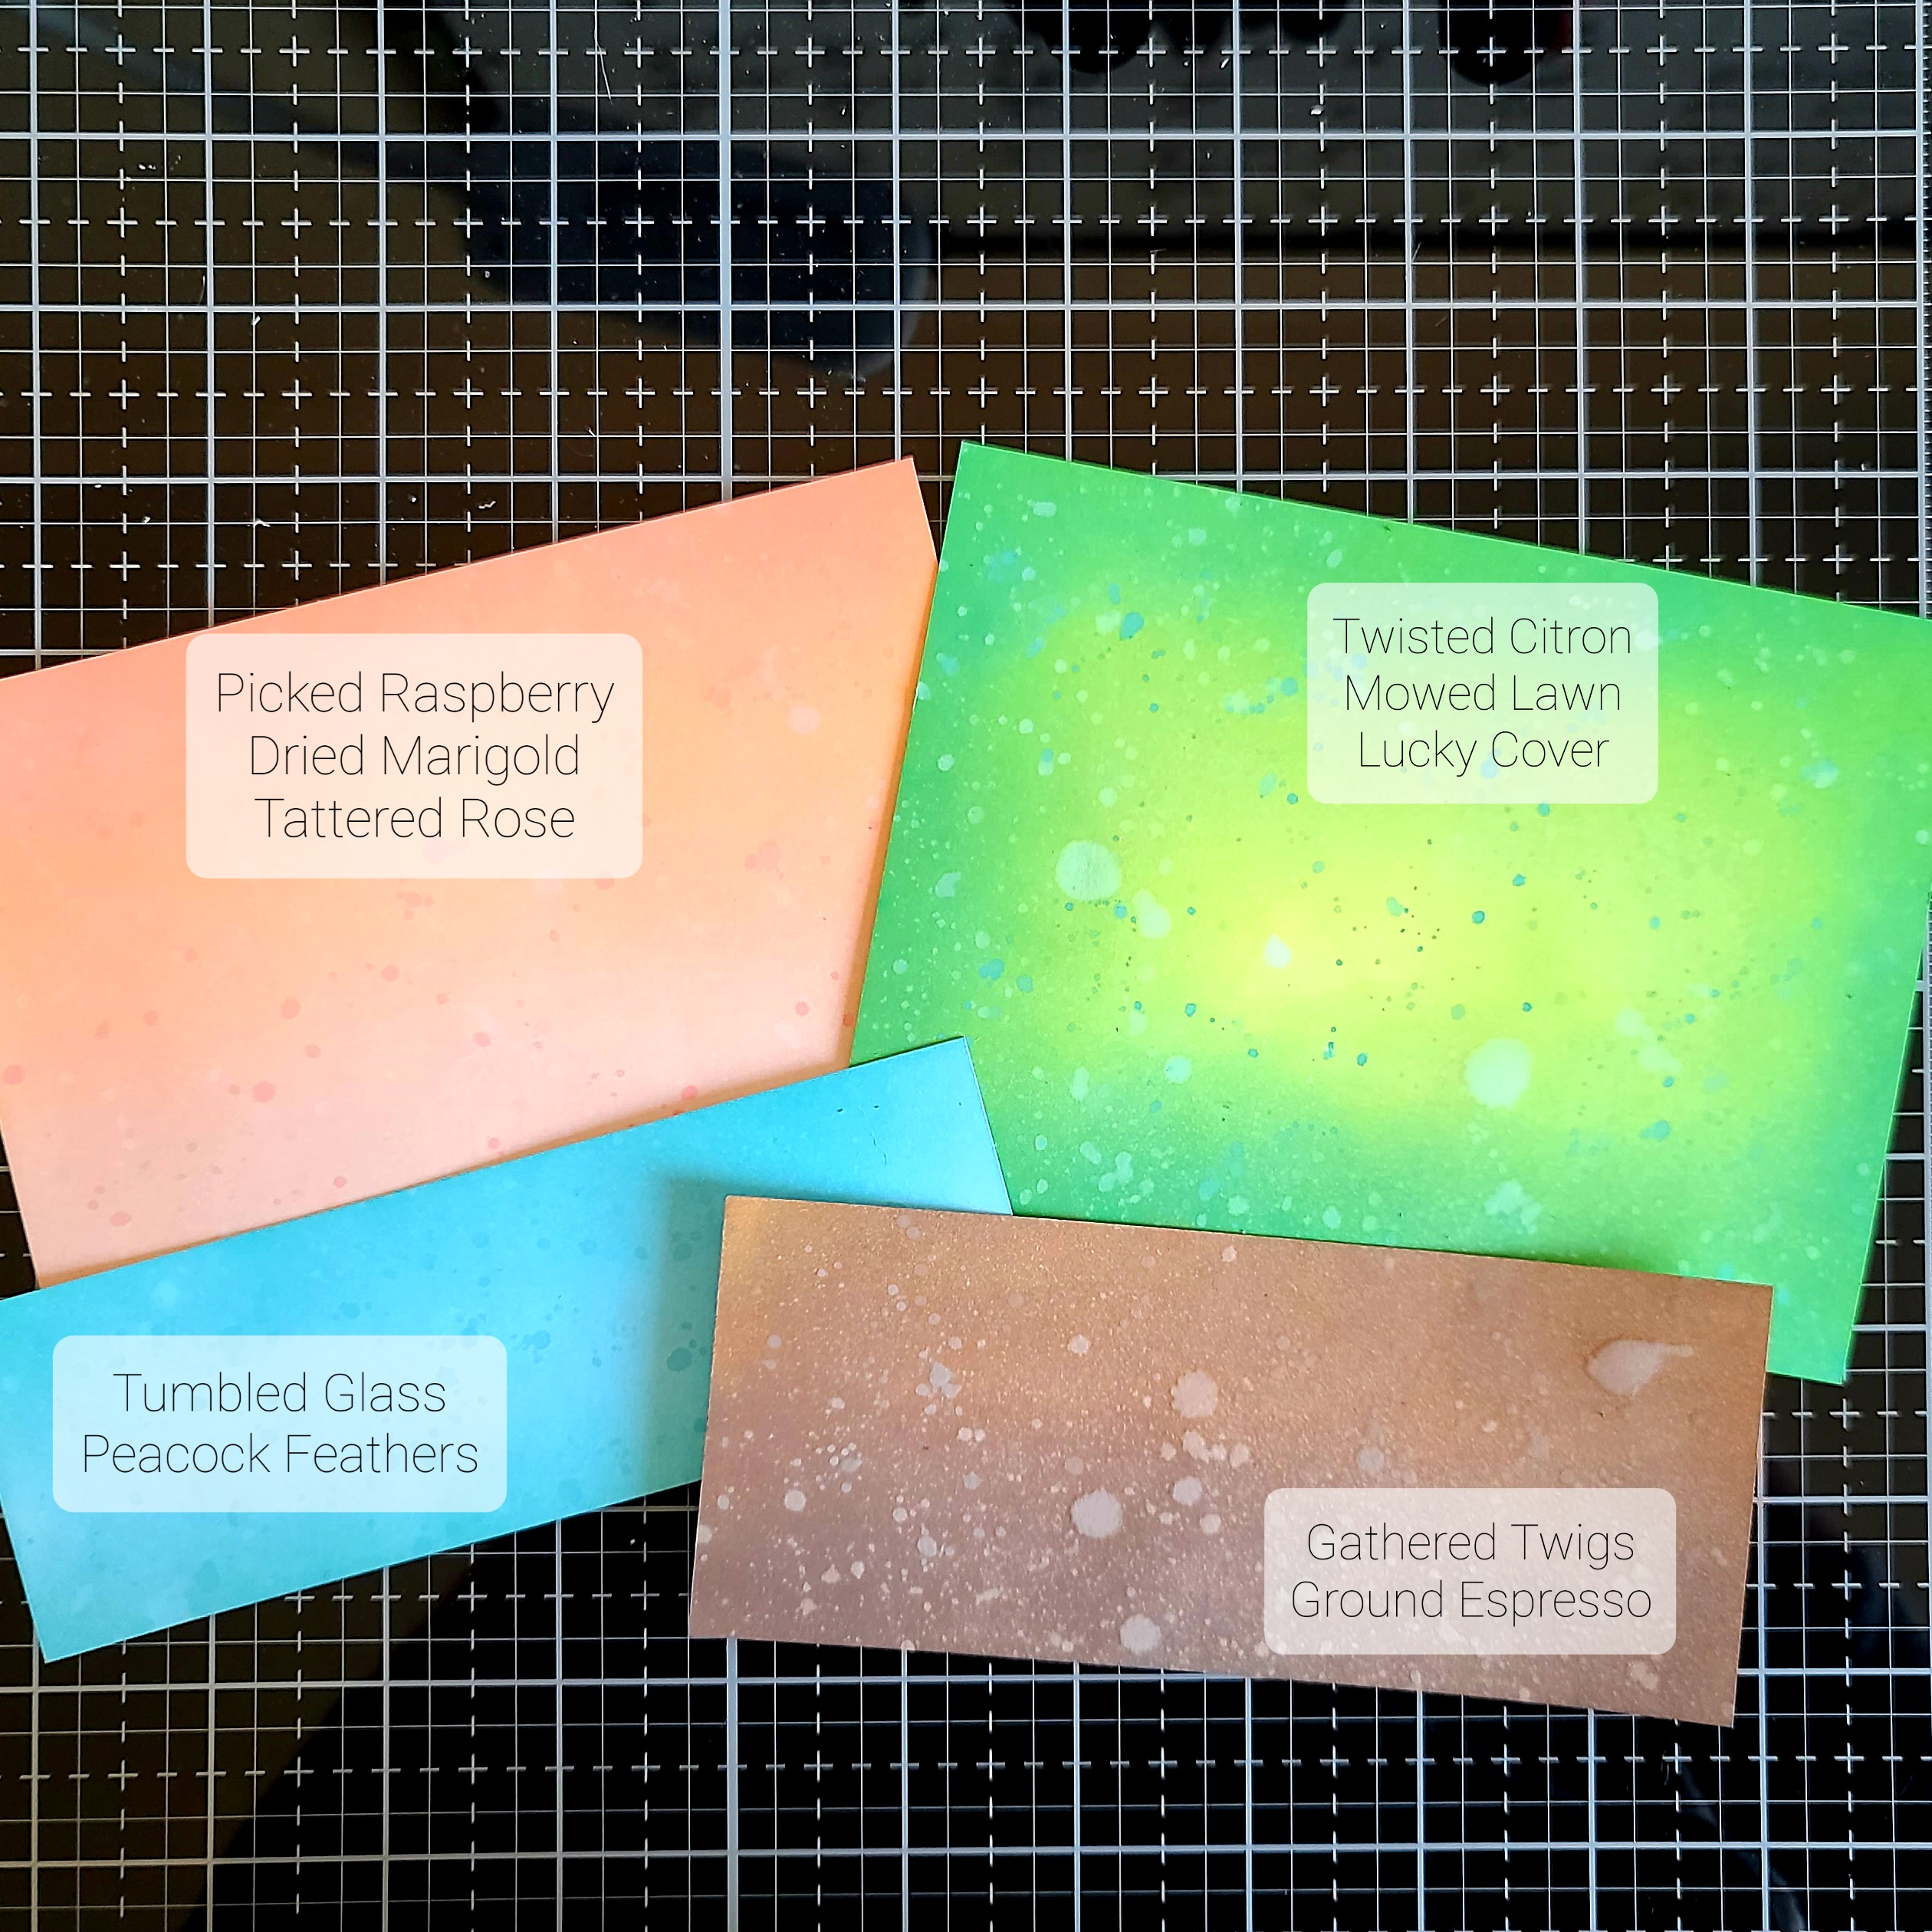
To make things simple, I inked up all my panels at once with my distress oxide inks. After each panel was inked I smooshed the ink pads on my glass mat, spritzed it with water and then flicked the watered down ink on the panel for extra texture. this is a new favorite technique that I do pretty much every time I pull out distress inks to play with.
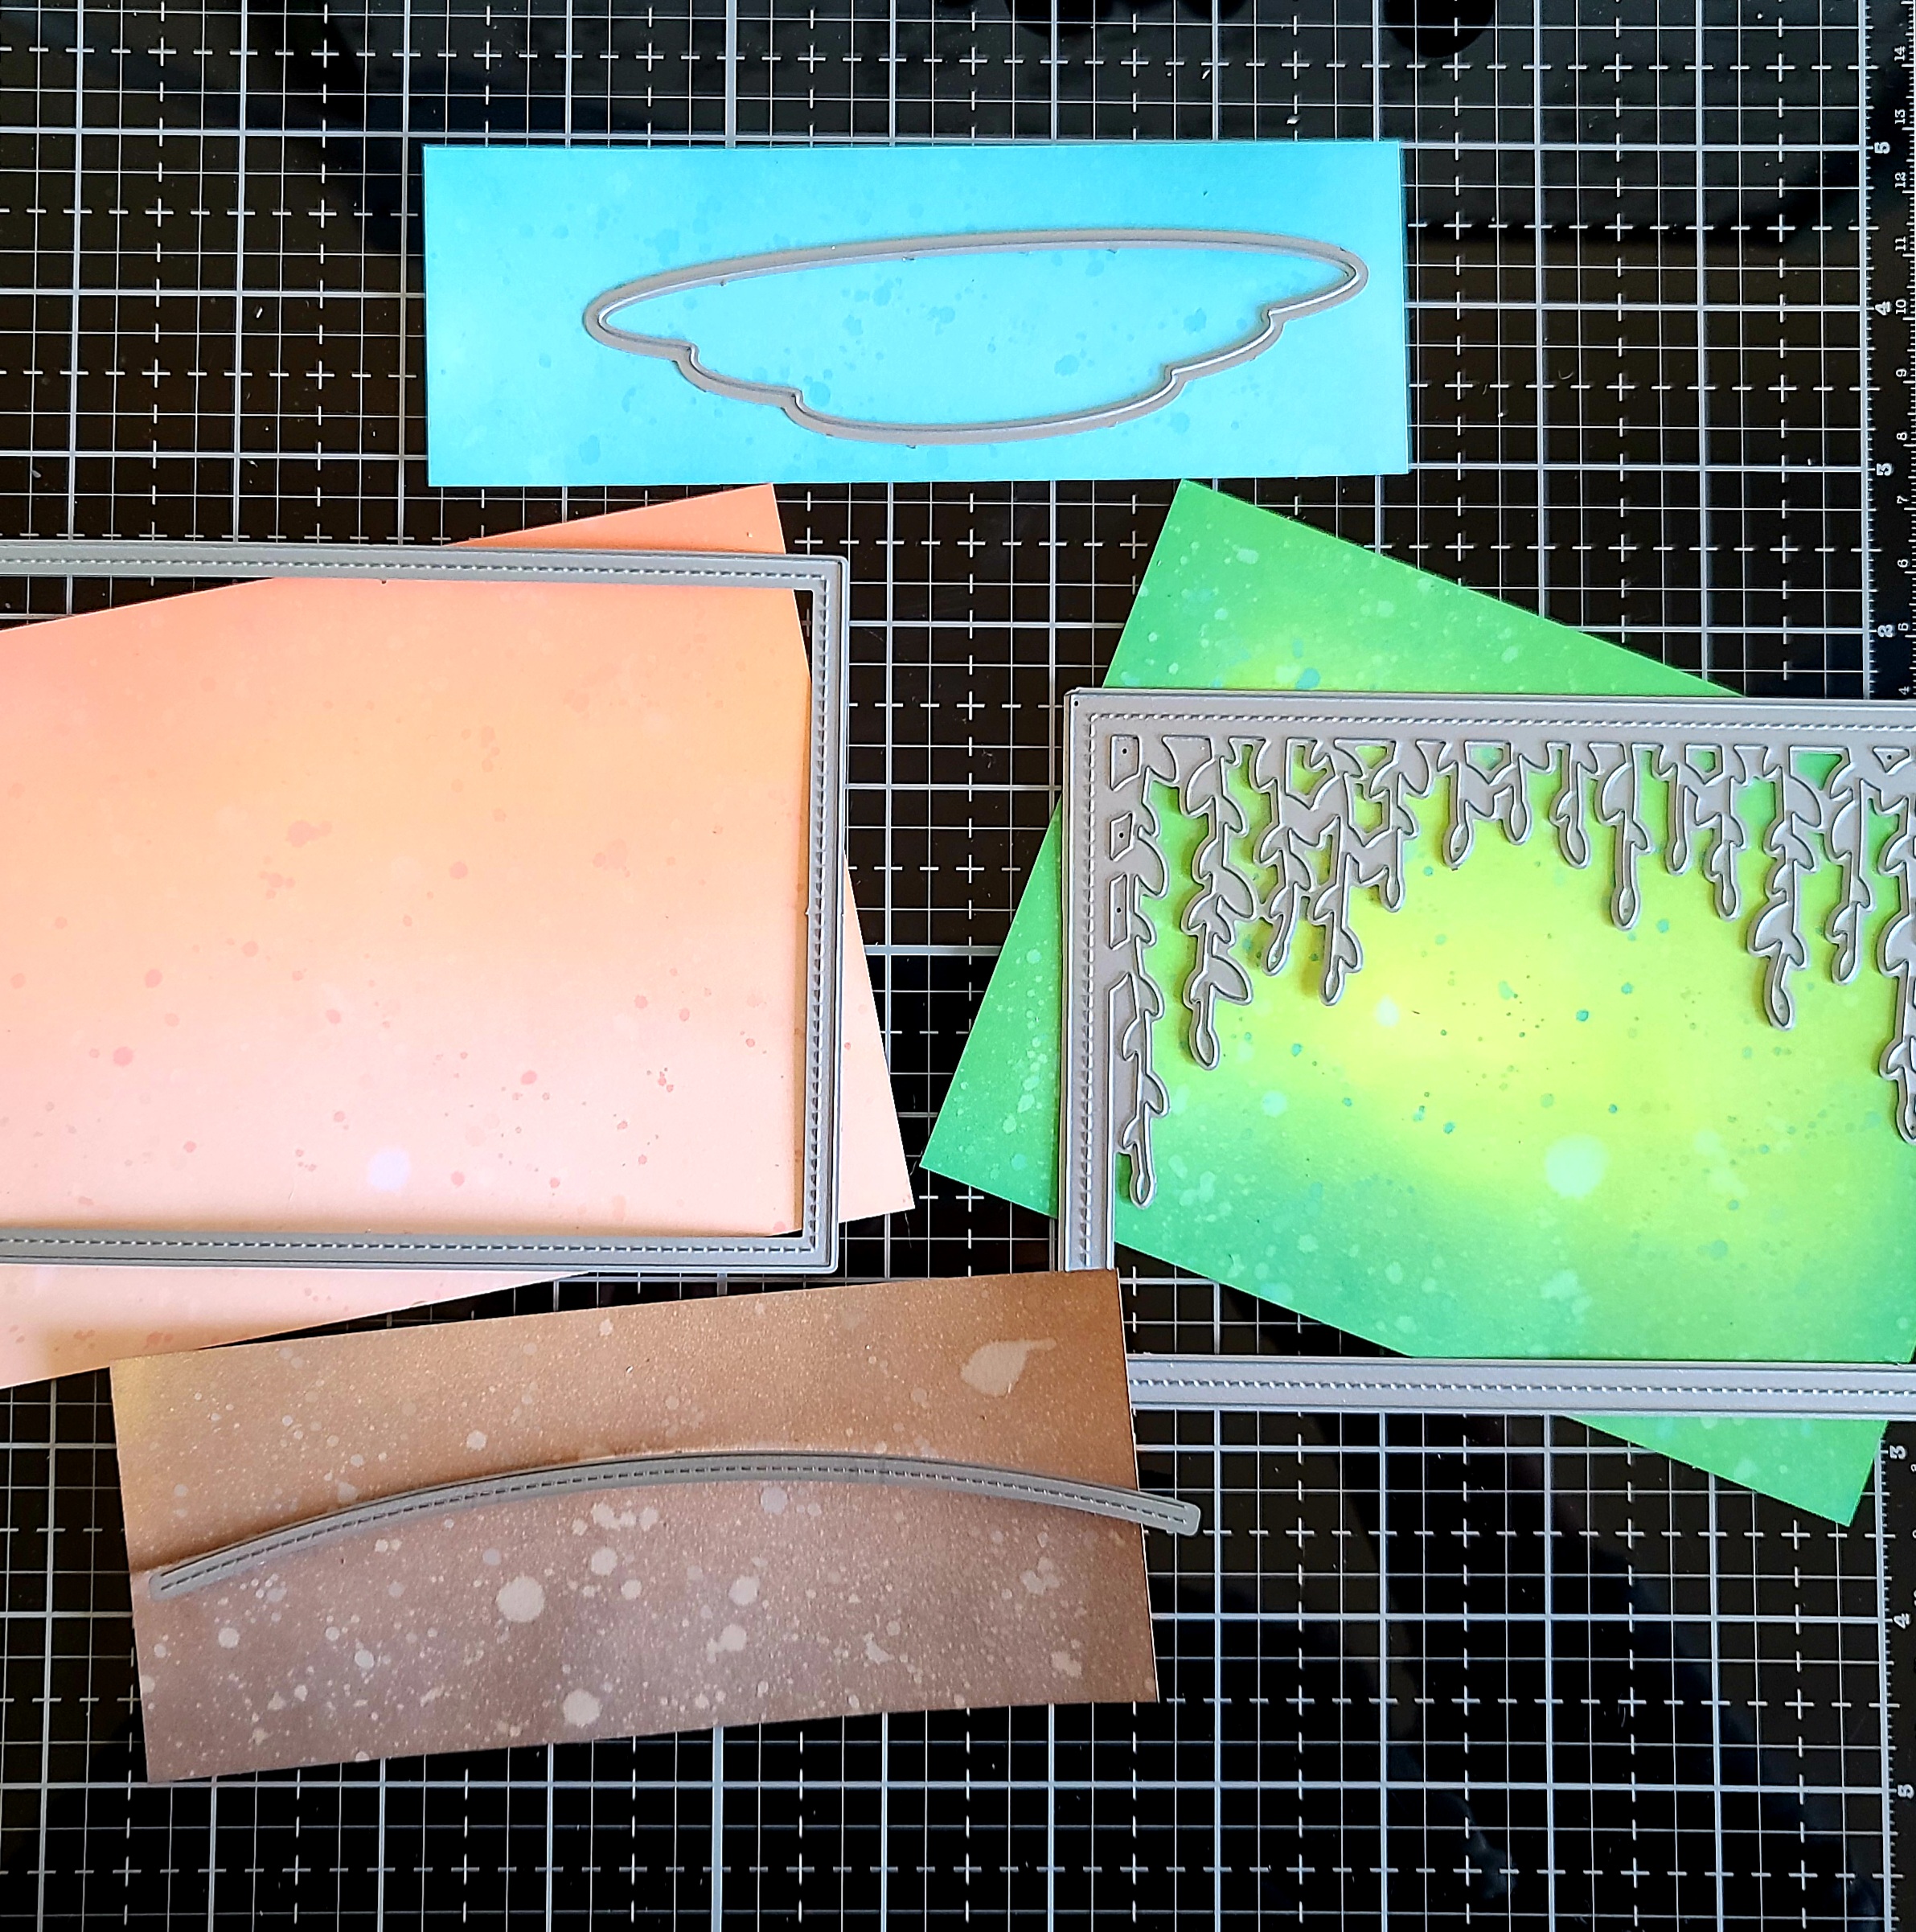
Once the panels were dry, here are the dies I used to cut each panel. The green from the bayou backdrop die, saving that large portion in the center to come back and cut the grass and cattails from later on. The brown was cut from a hillside border first and the same stitched rectangle as the peach panel after so they layered nicely. And last, the little pond die comes from the bayou backdrop set.
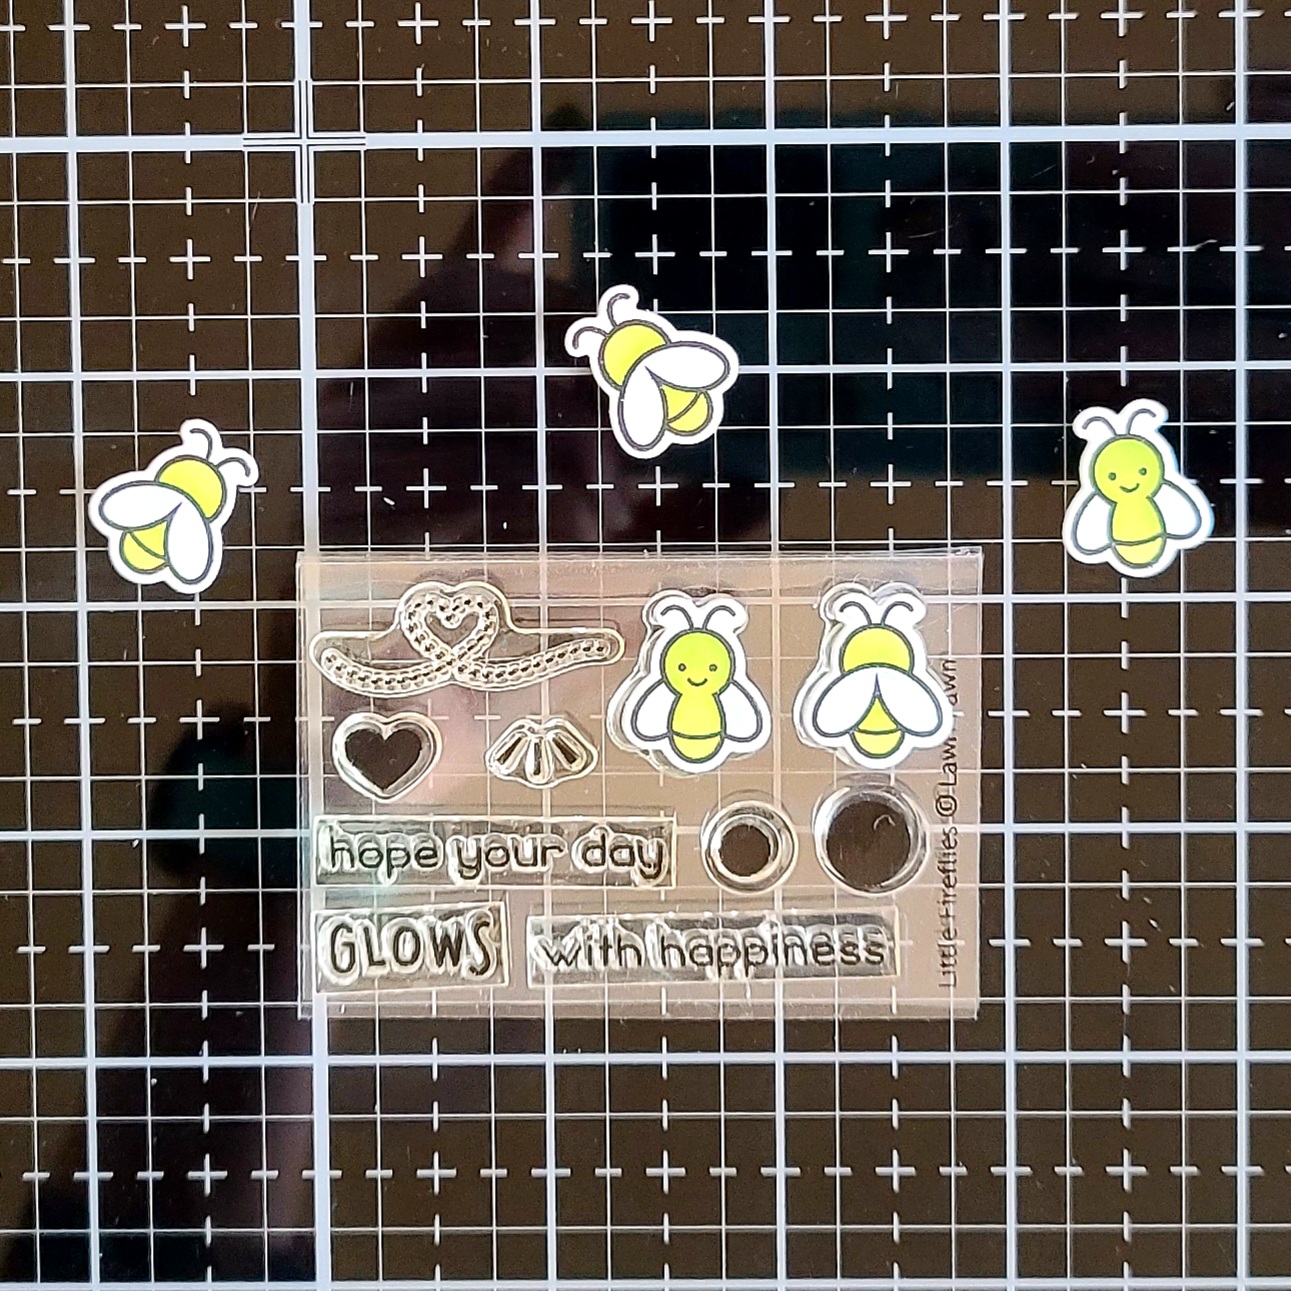
Next, I stamped, colored and die cut some cute fireflies from the Lawn Fawn Little Fireflies set. I thought it would be fun to have front-facing and not so I did a combination of both images.
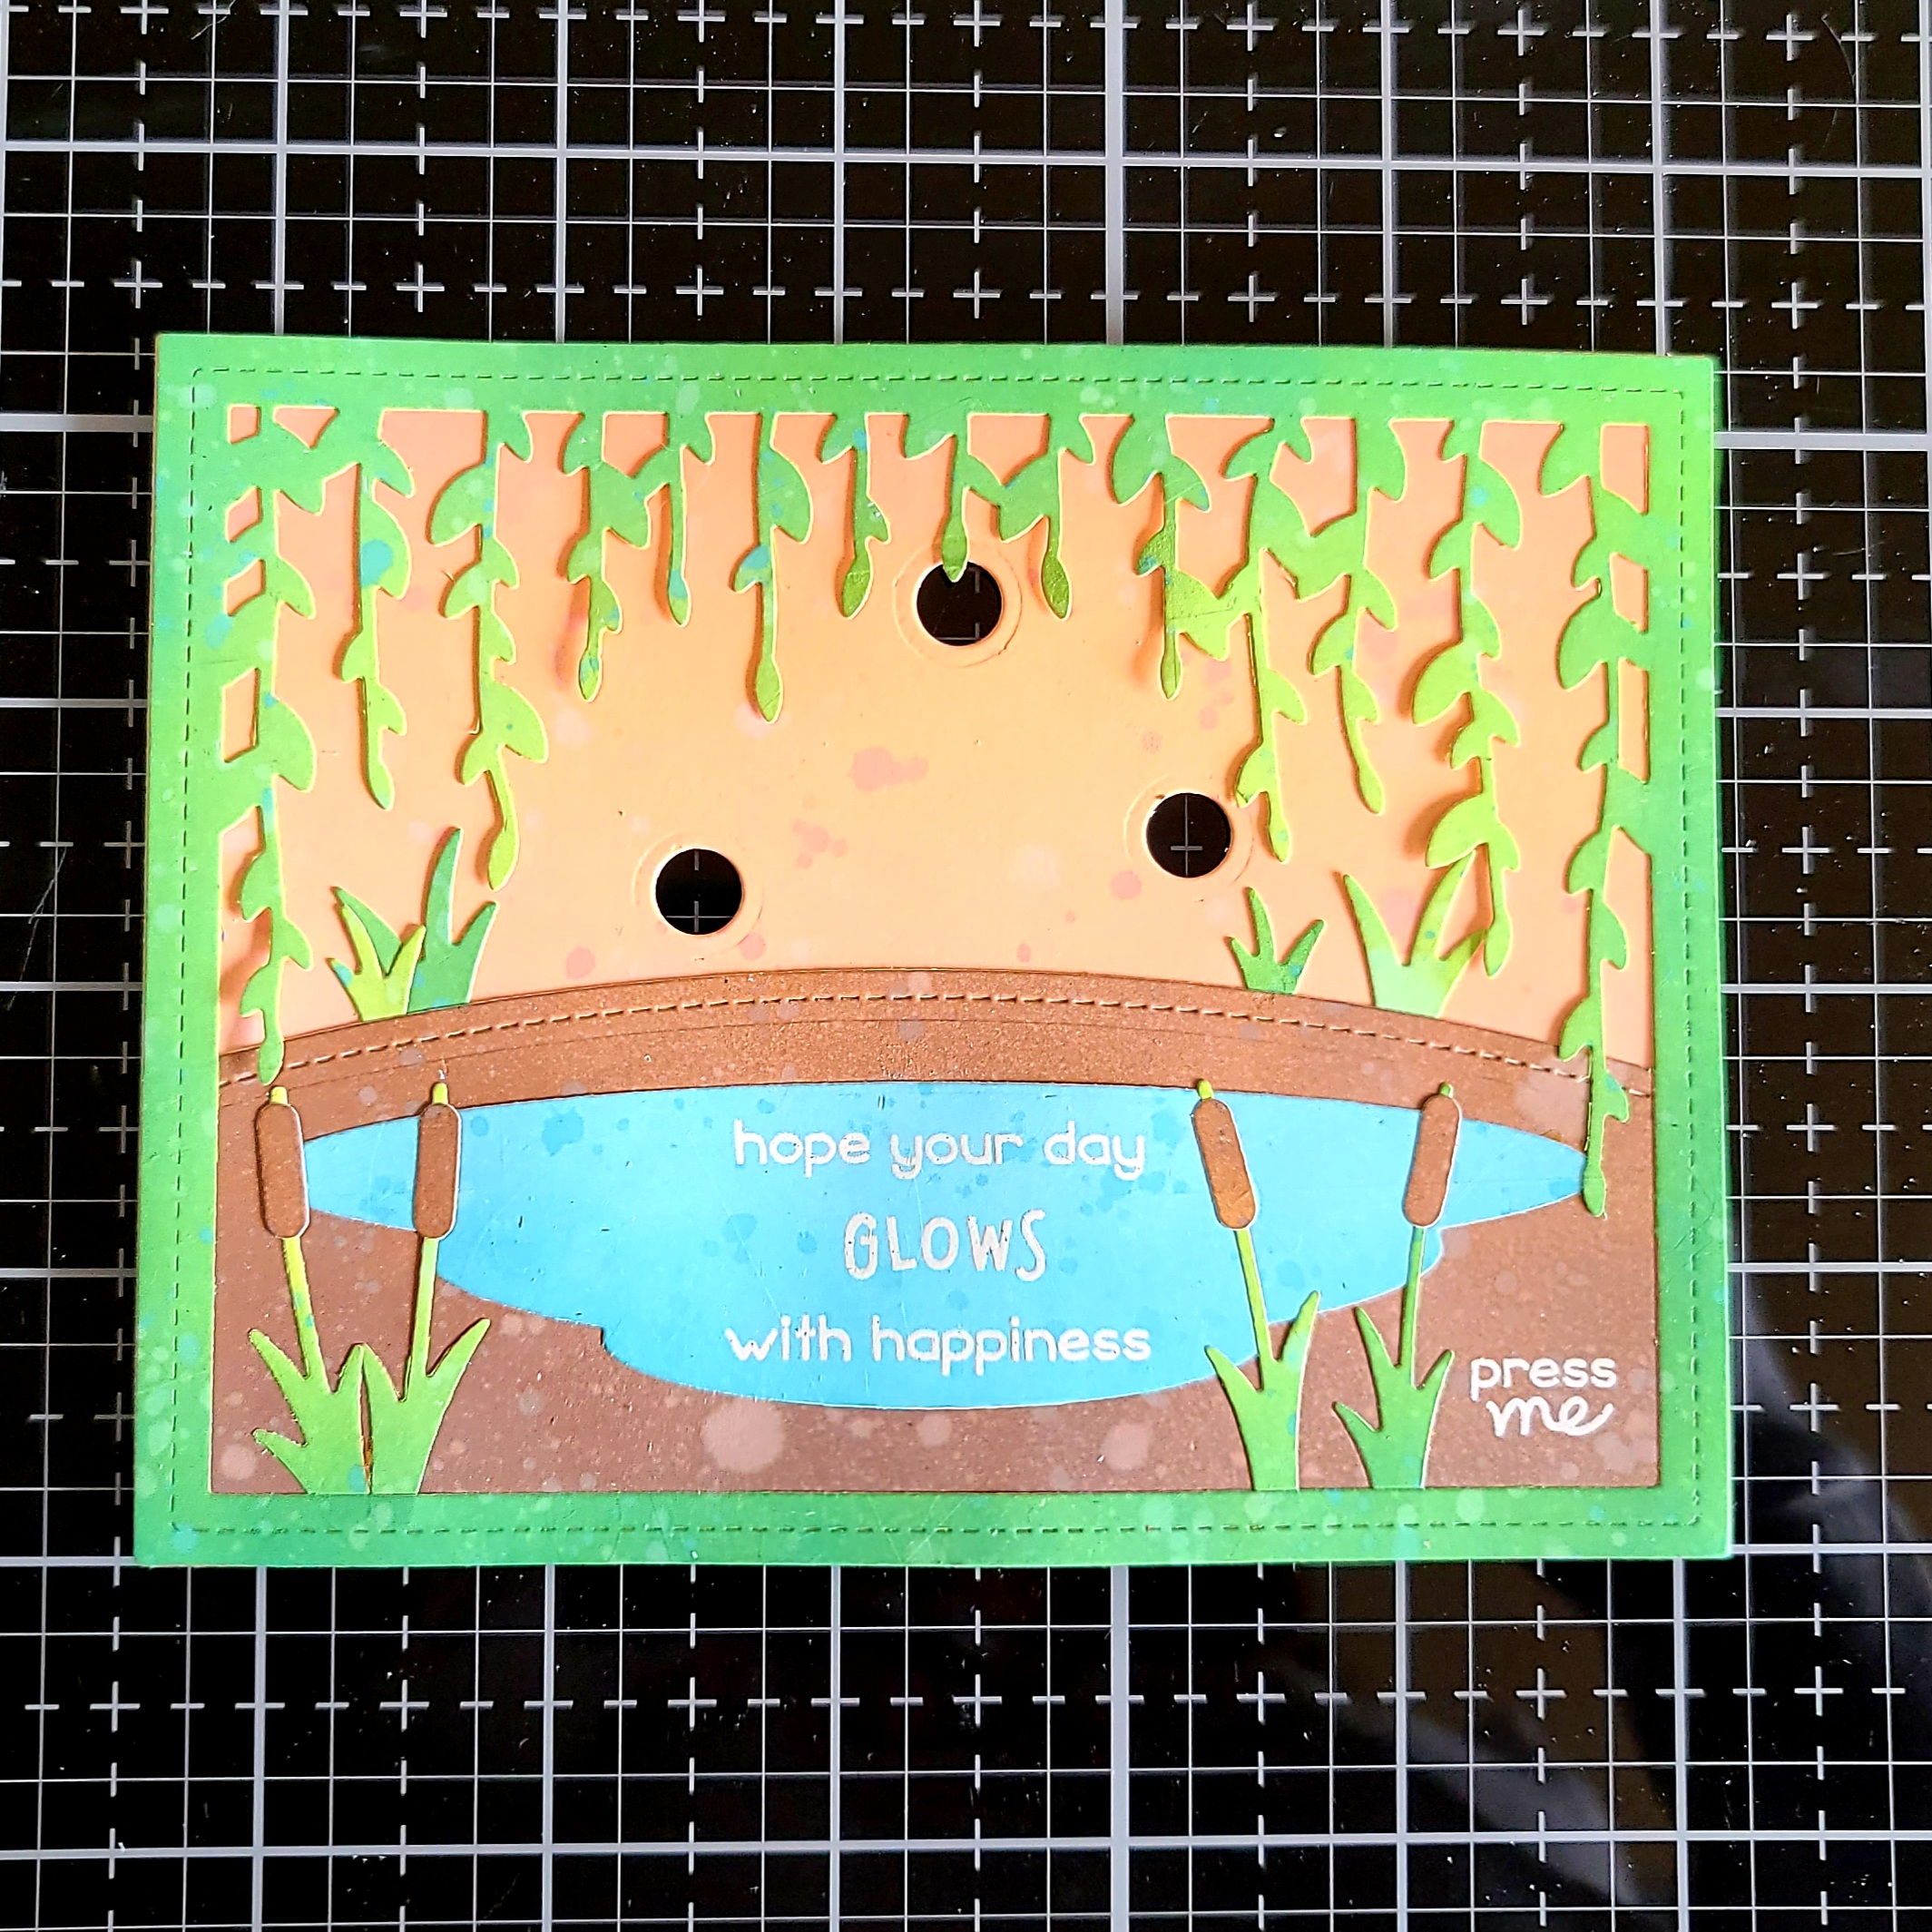
Next, I stamped and heat embossed the sentiment from Little Fireflies on the lake piece. Then, using the frame and lake as guides, I stamped and heat embossed “press me” on the dirt hill where I want my button to be. This word stamp comes from the Lawn Fawn Push Here stamp set. It’s great for lots of different types of interactive cards. Then I used liquid glue to adhere all of my layers together. Then I took a circle die that happens to come in the Little Fireflies set (for their glowing bottoms if you use that stamp) and cut 3 circles out of the background so the lights could shine through.
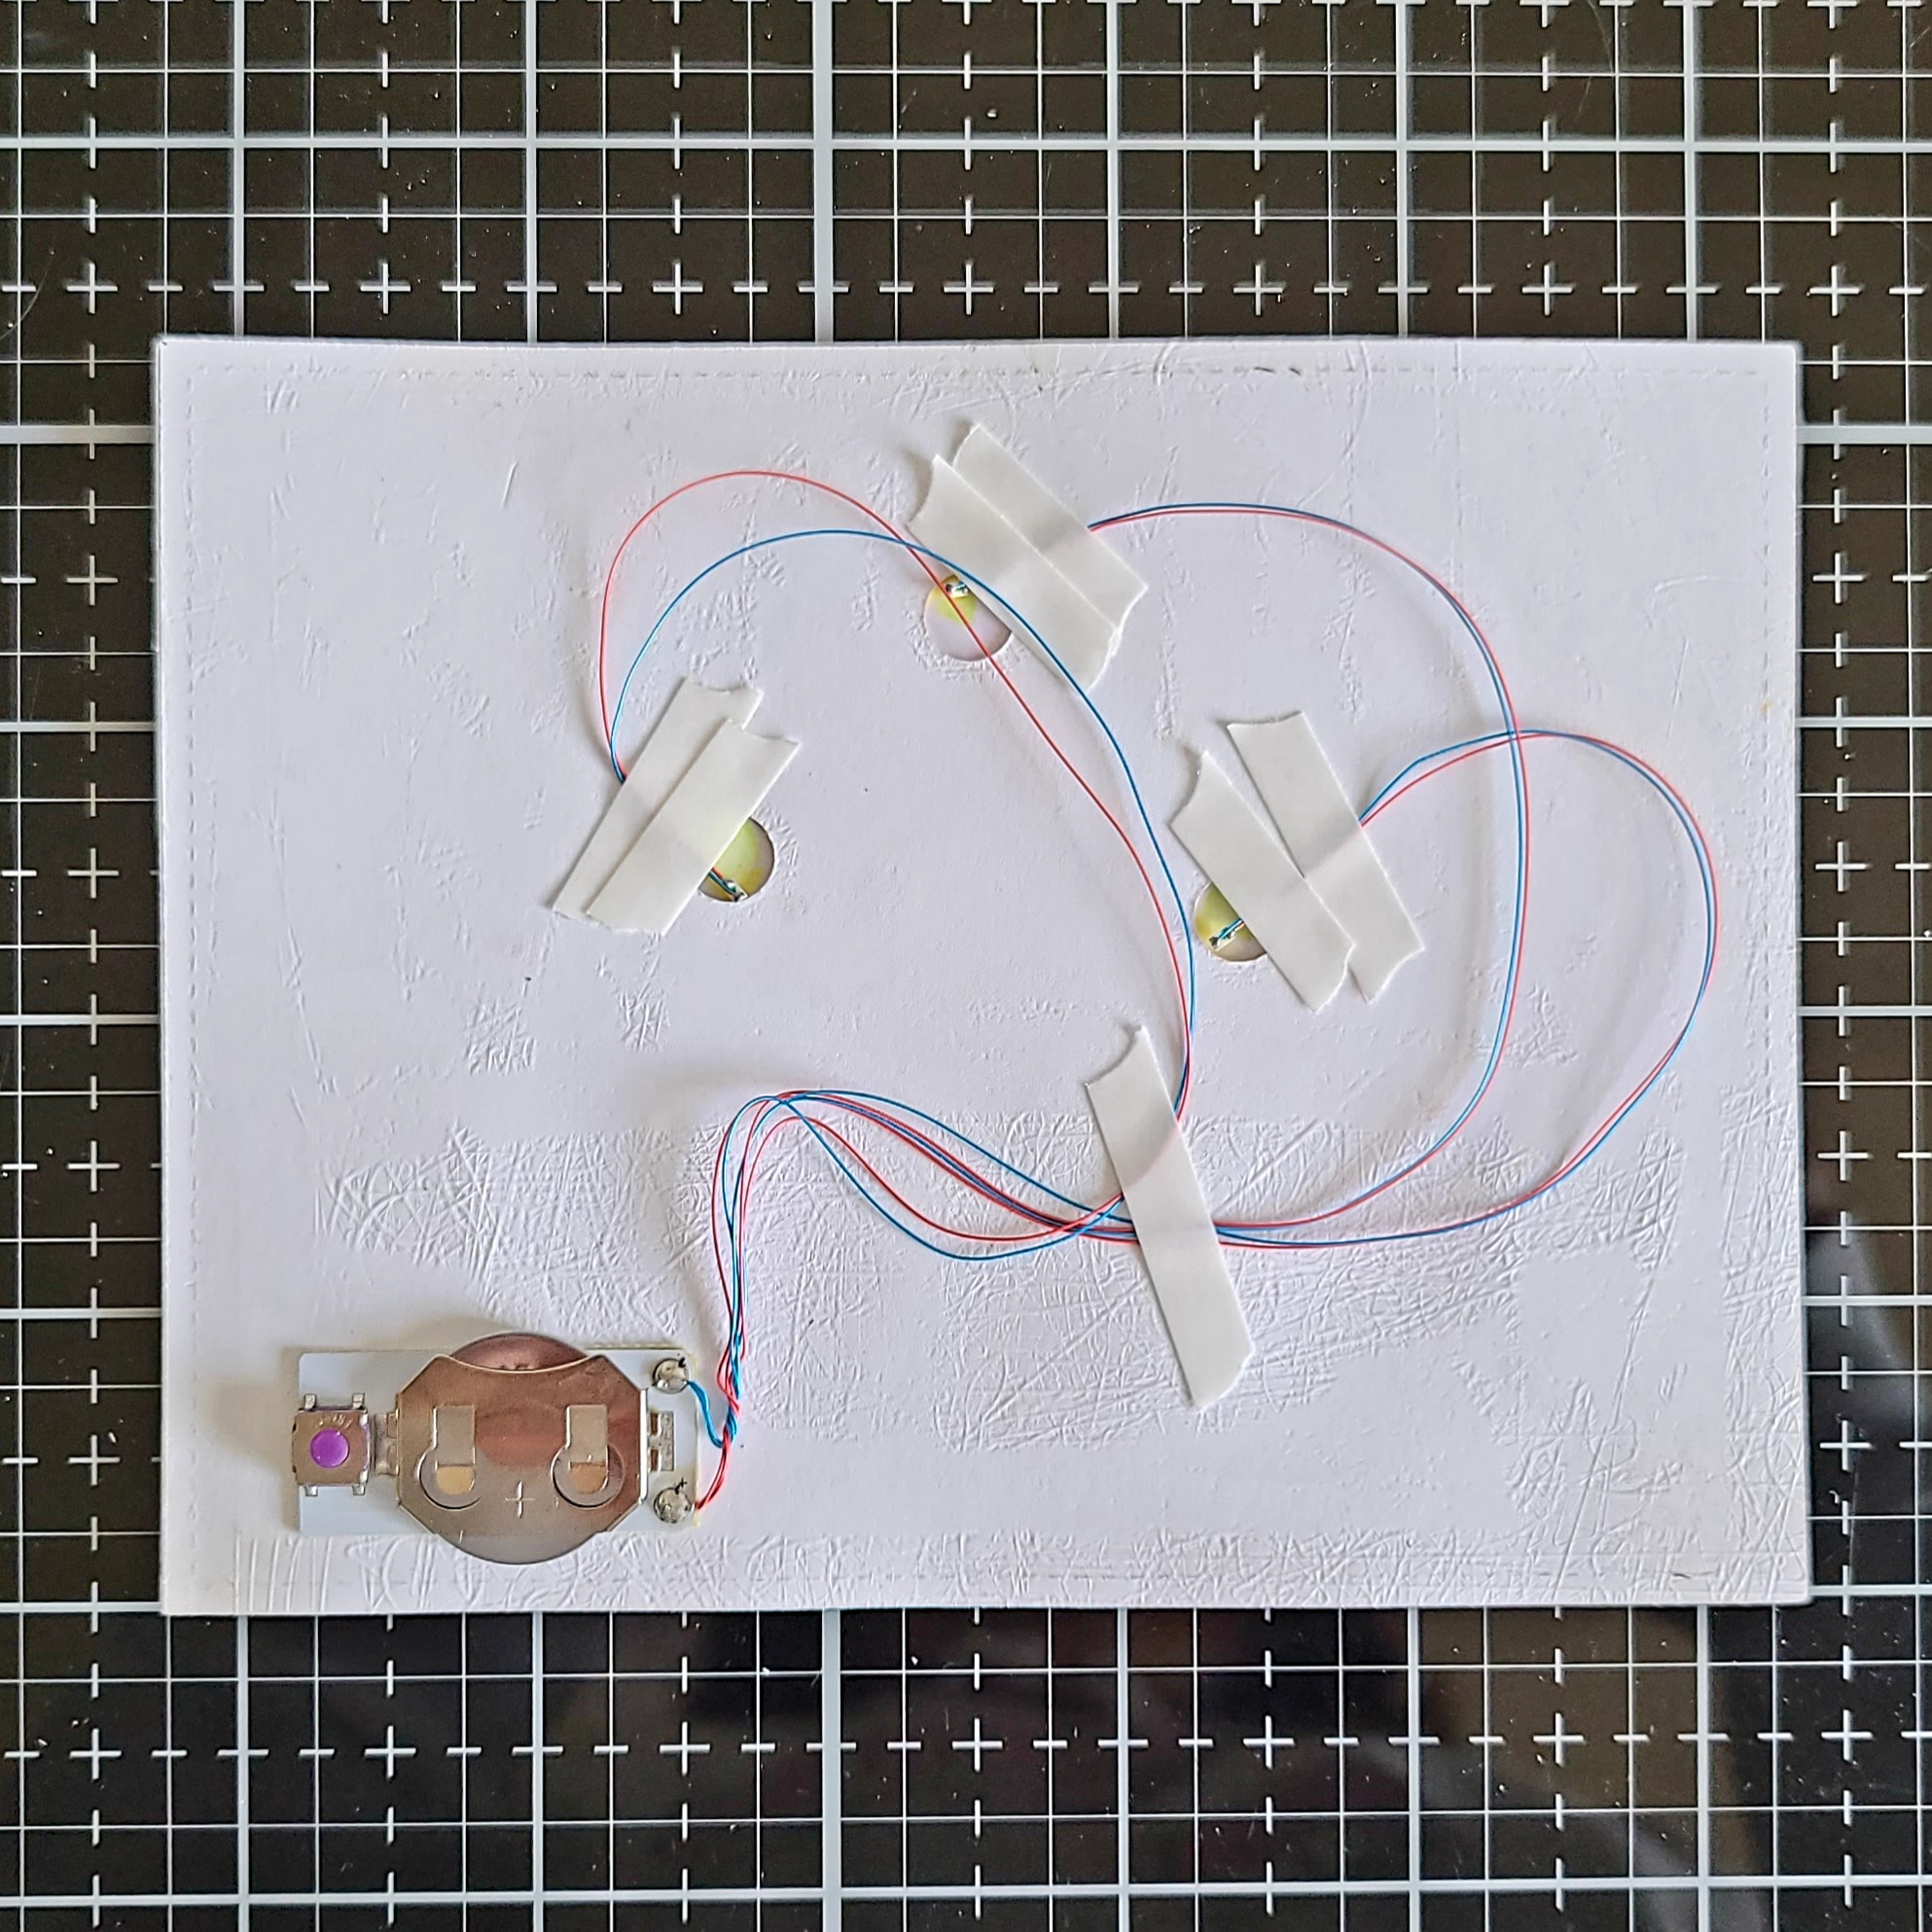
Next, using scrappy tape, I adhered the battery pack of my EZ-Light to the back of my card front so it lines up with the “press me” on the front. Then I used the same tape to adhere the lights in place over the holes. I flipped my card over, added the fireflies and then adjusted the lights a bit until they lit the fireflies up how I liked. Once there were perfect, I added a few more strips of tape to securely hold everything in place.

Finally, I added a double layer of foam tape to the back of my whole panel and added it to a white card base.
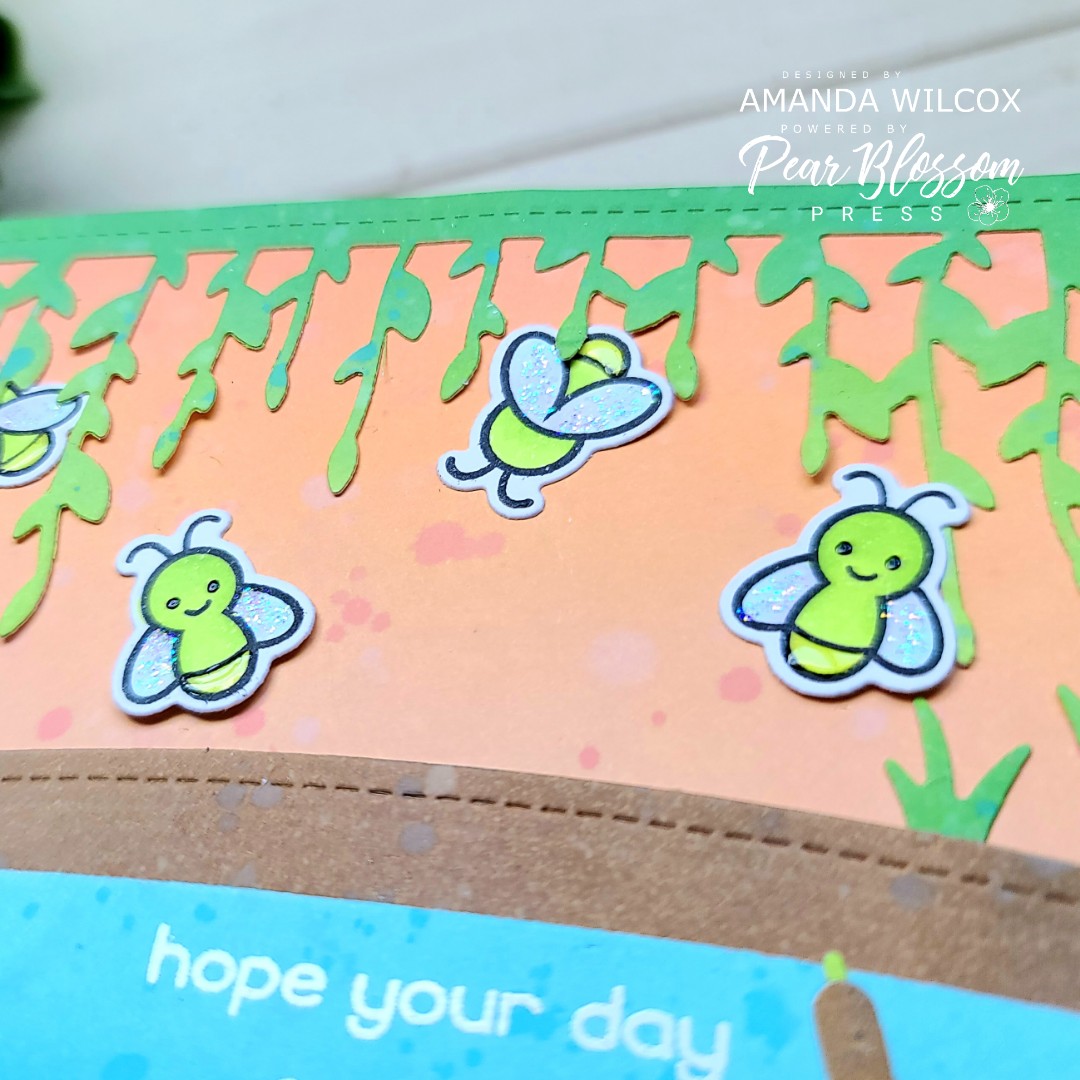
I know there is a lot going on but I just couldn’t leave things the way they were. For finishing touches, I added black glaze pen to the eyes, unicorn Stickles to the wings and glossy accents to their bums! I just think this is too funny and makes me smile!

Ta-da!!! Isn’t this just the cutest ever?!? I am so extremely happy with how this fun card turned out! It’s a good thing these batteries last a while because I keep playing with it on my craft desk.
I hope you found some inspiration to create something wonderful and don’t be afraid to try light up cards. They are so much fun and Pear Blossom Press has taken any difficulties away with their amazing products!
Here is a list of the products used on today’s project, using affiliate links at no additional cost to you:
Pear Blossom Press EZ Lights
Lawn Fawn Little Fireflies stamps and dies
Lawn Fawn Bayou Backdrop dies
Lawn Fawn Simple Stitched Hillside Borders
Lawn Fawn Large Stitched Rectangles
Lawn Fawn Press Here stamps
Distress Oxide Inks
Scrappy Tape 1/4 inch
Tombow Mono Multi Liquid Adhesive
Glossy Accents
Stickles – unicorn
I appreciate you sharing your time with me. Have a fabulous day!
A great big thanks to Amanda Wilcox for joining us as a guest designer on the blog today! Be sure to follow her blog for lots more inspiration. And don’t forget to visit her Etsy shop where you can find some of the coolest embellishment trays and papercrafting supplies around!
This site uses affiliate links whenever possible (at no additional cost to you), but only for products we actually use and love. If you make a purchase using one of the links above, Amanda Wilcox might receive a small commission, to help support her hobby.
