
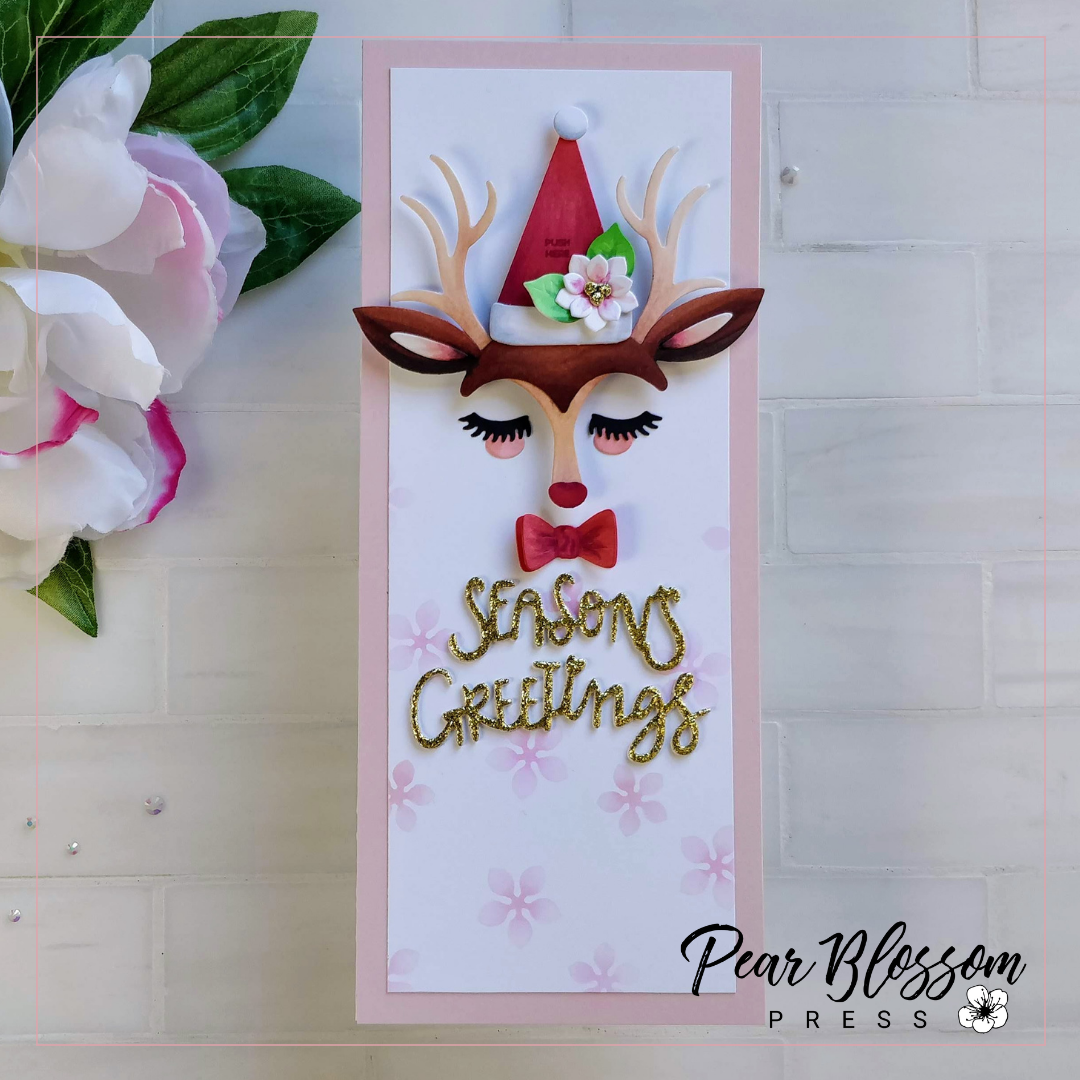
Okay, tell me this isn’t the cutest light-up reindeer you’ve ever seen! I fell in love with Spellbinders’ Season’s Greetings Deer set when I saw it last year, but I missed it. Luckily, it’s back! And be still my heart, Yana Smakula reached out and asked me if I wanted to create something with it. Double yay!!! Of course, I couldn’t pass up the opportunity to turn this little cutie pie into Rudolf, with a red nose that actually lights up, right?
First, let me show you what it looks like in action. Then, we’ll go through the steps…
[one_half]
[/one_half]
[one_half last][/one_half]
Step 1…
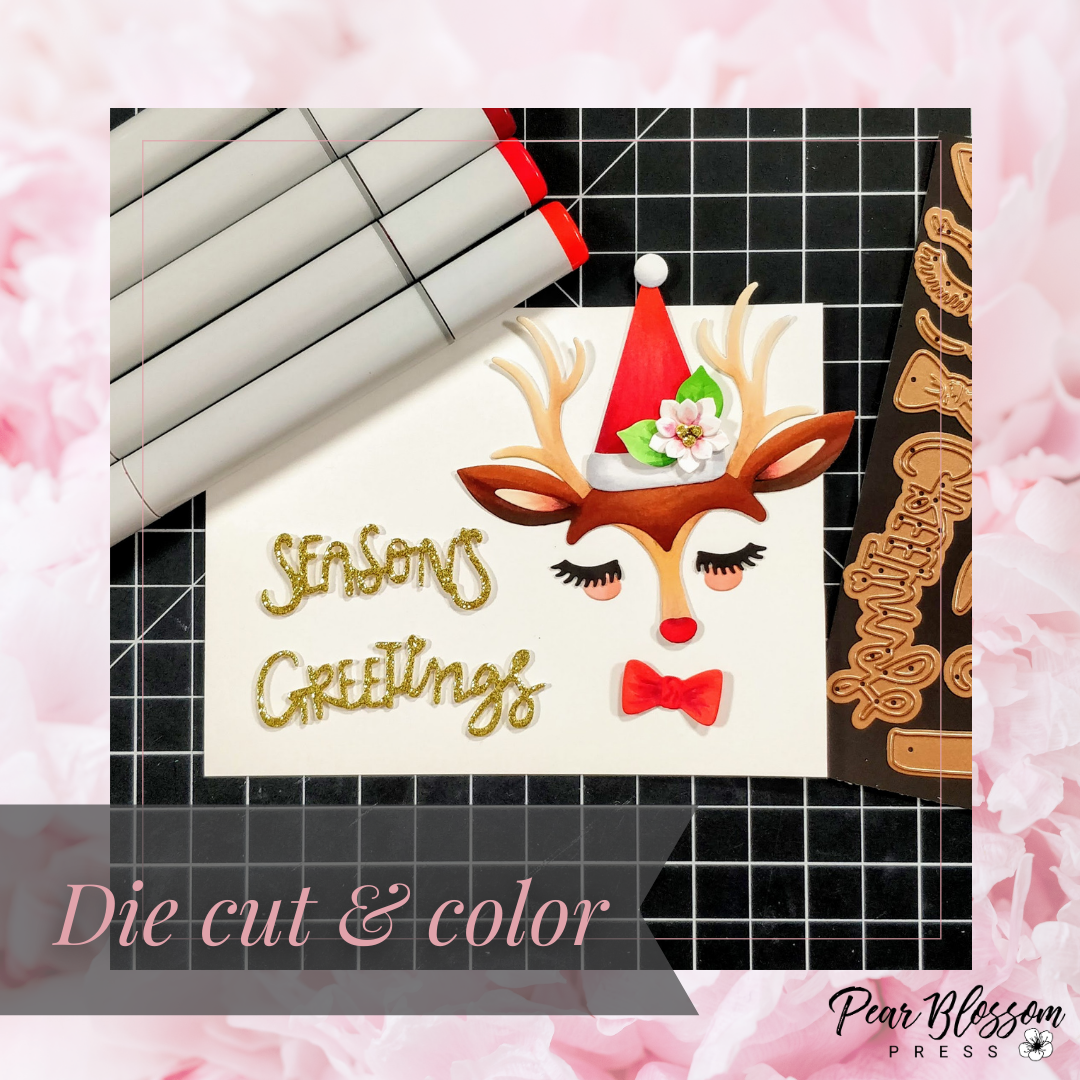
Decide what pieces you want to use to create your reindeer and die cut them. The set comes with a lot of options to make a whole slew of different faces. You’ll need to cut out the hat as well, so there is enough room to hide your EZ-Light underneath. I die cut my pieces from white cardstock and colored them with Copic markers. You can skip this step and cut from colored paper, but I love to add shading and details on my die cuts. Also, I should mention, I cut two layers of the hat brim and ball for added dimension. Same with the bowtie, except I only glued the centers together so I could pop up the sides a little. For the sentiments, I stacked two layers of white cardstock under the gold glitter layer.
Step 2…
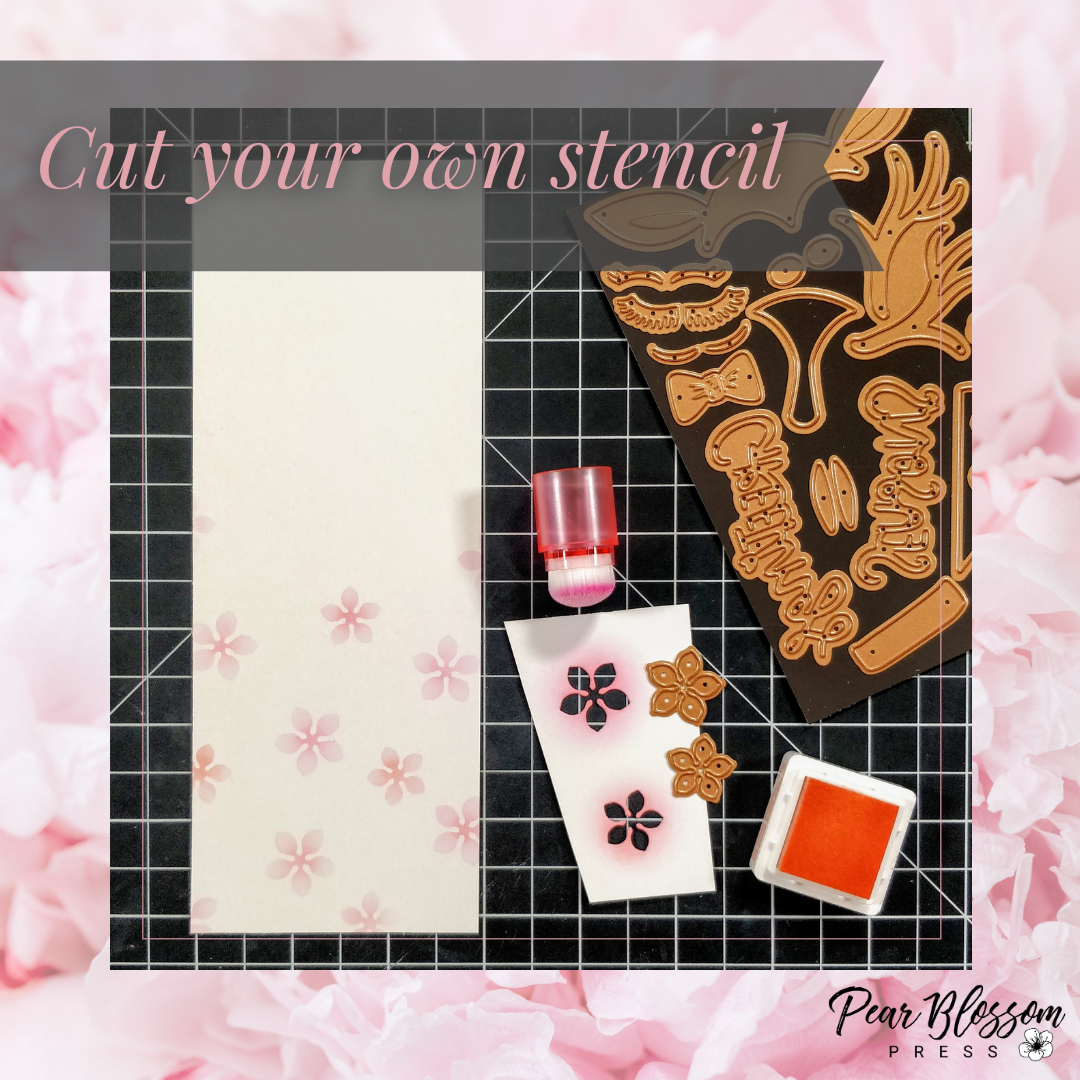
Die cut a stencil with the flower dies. Blend ink through onto the lower portion of a 3″ x 8″ panel. I used pale pink ink, to match my slimline card base (3½” x 8½”). If you want a more traditional color palette, you can use red, or light brown/kraft.
Step 3…
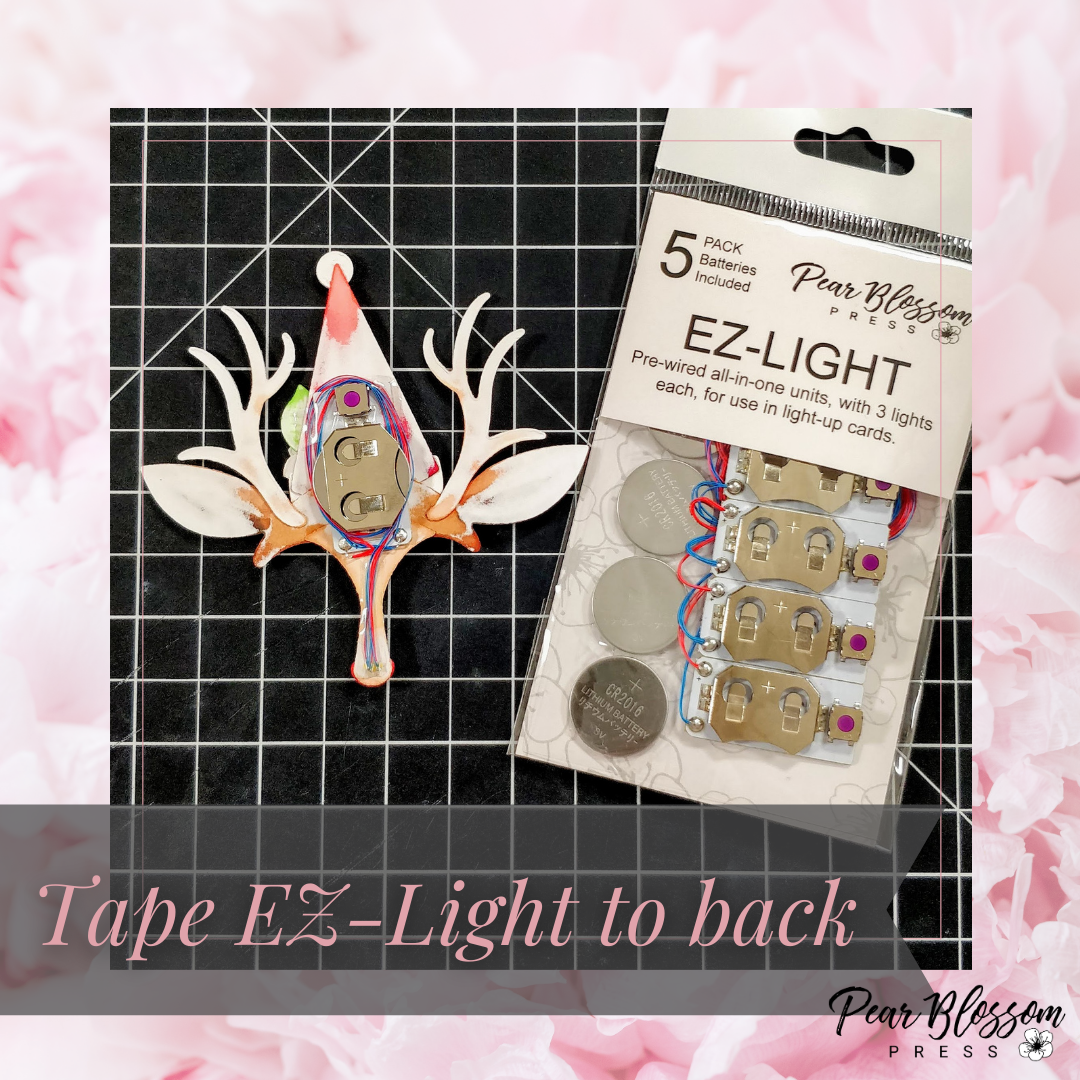
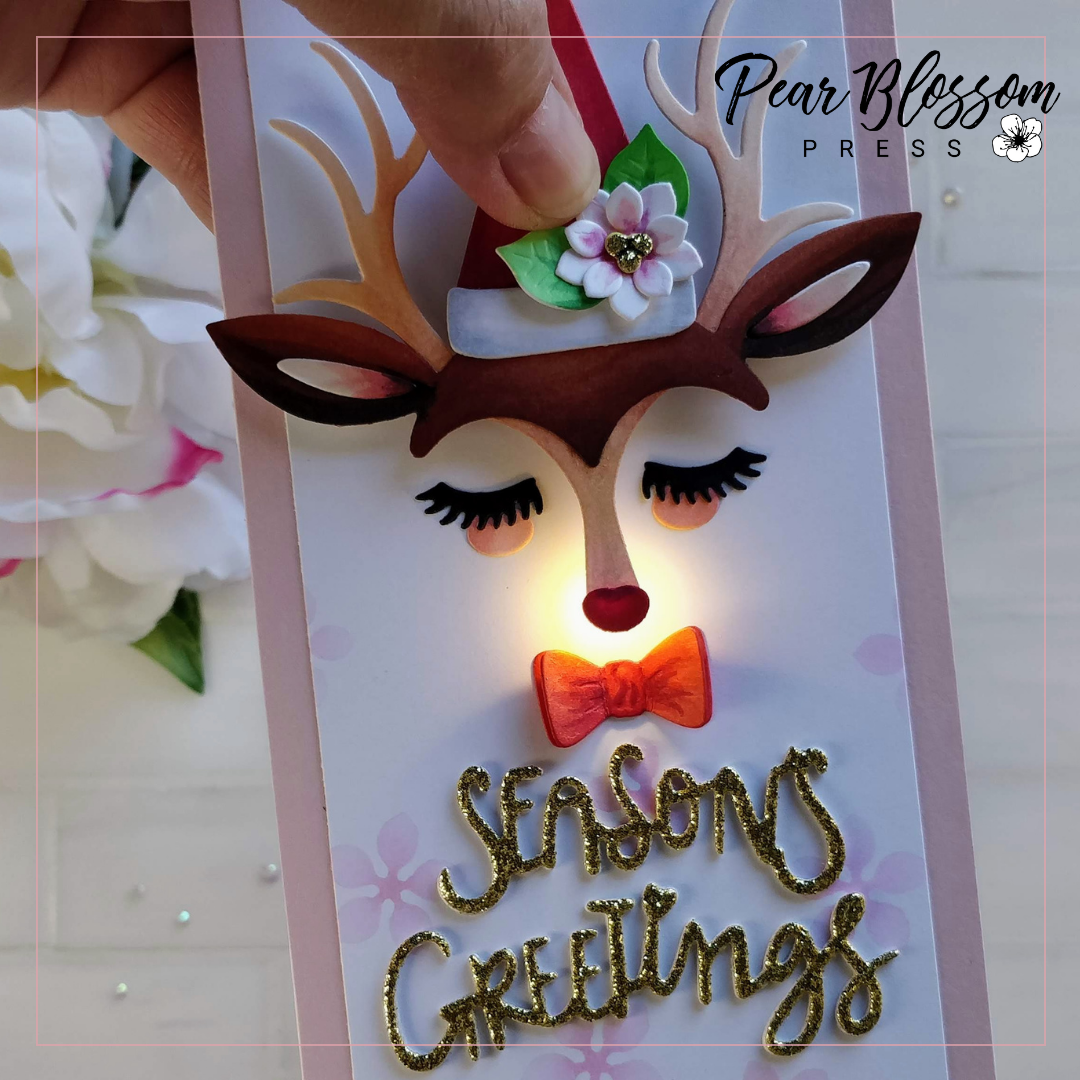
Glue the reindeer pieces together (don’t worry about the eyes, cheeks, or any parts that don’t get attached to the main head piece yet). I stamped the words PUSH HERE on the front of the hat before adhering an EZ-Light in place, just because it was easier than trying to stamp on an uneven surface after. If you don’t have a stamp, you can always write it in with a coordinating fine tip marker.
When I taped the EZ-Light in place, I used double stick tape under the battery pack. It has three lights on separate wires, so you can light up three different elements on a card. I only needed one, so I bunched them together for an even brighter light. I coiled the wires around the unit, and used a glue dot at the tip of the nose to catch all three lights. Scotch tape helped secure the wires in place, so they can’t slip out later.
Step 4…
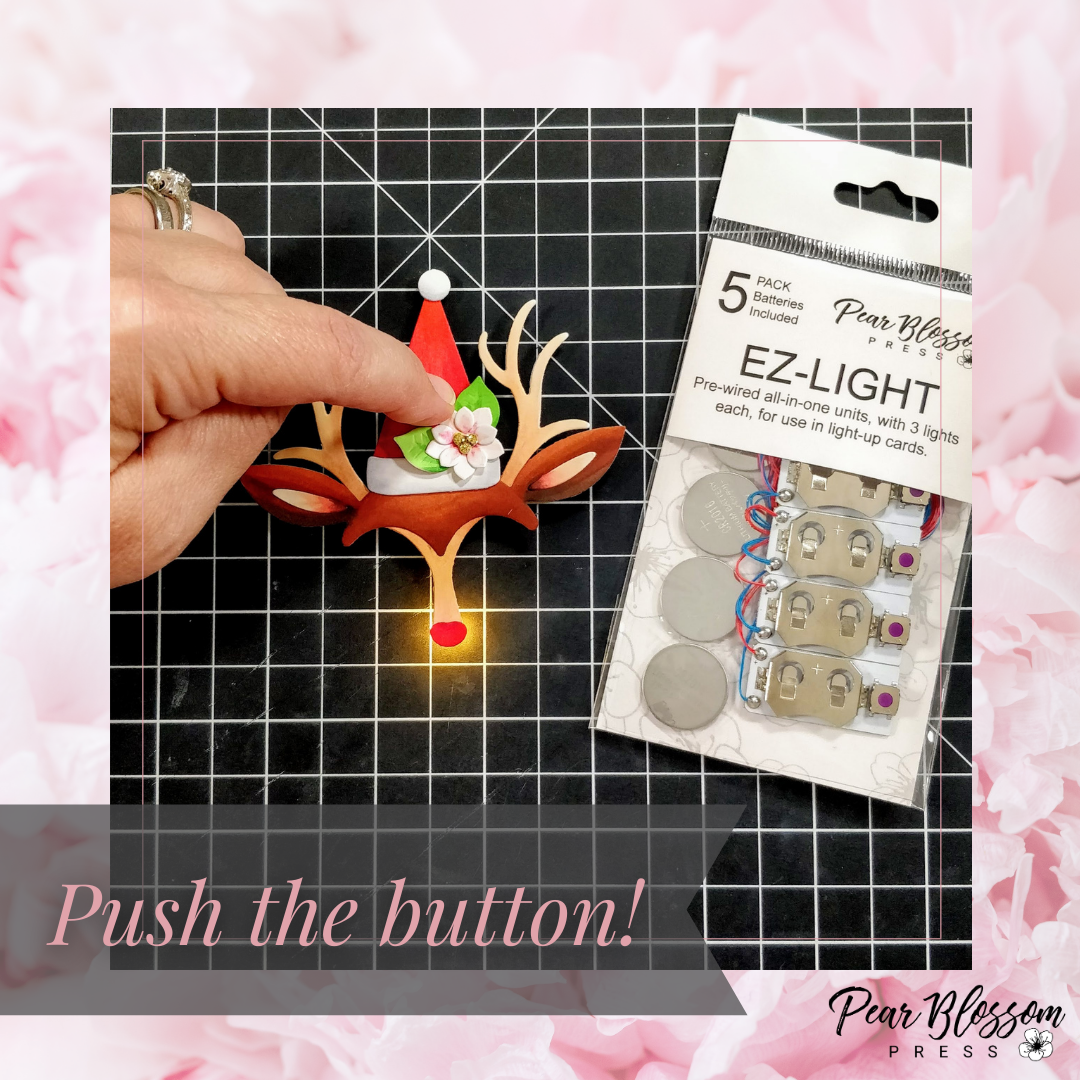
Flip it over and test it out. You will find yourself pressing that button a lot. Don’t worry, it’s totally normal. I can’t tell you how much fun these are to play with!
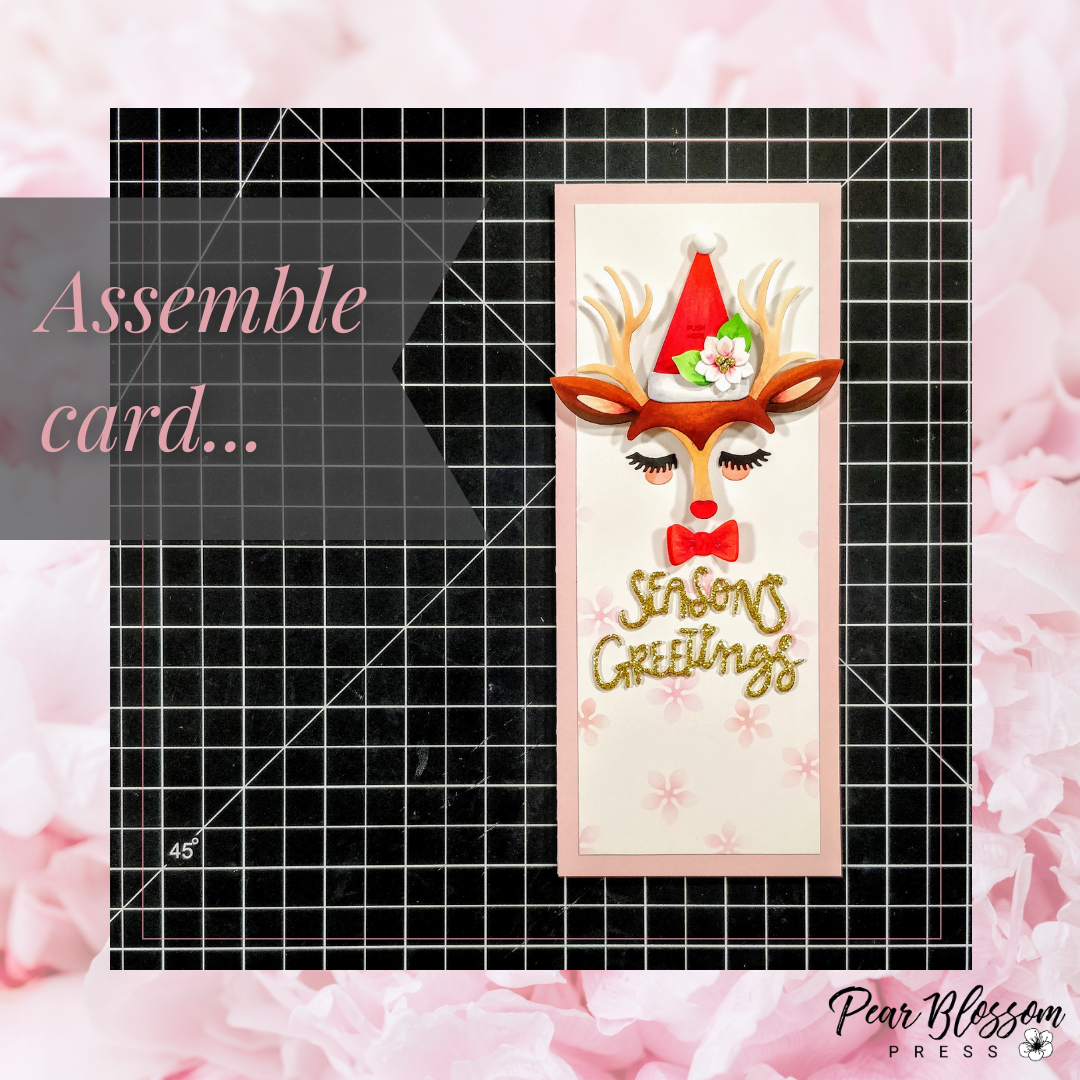
Step 5…
Assemble the card. Glue the stenciled panel to the card base. Attach the reindeer head to the panel with double thick foam tape (I used pieces on the ears and at the top of the hat. No need to cut tiny pieces for the nose or antlers). Glue the cheeks, eyelashes, bowtie, and sentiment flat to the panel. You can add gems, or sequins if you like. I opted not to because I already had shimmer from the glitter paper on the sentiment and flower center.
Viola, that’s it! Well, maybe one more step. I suggest stenciling a few flowers on your #10 envelope so it coordinates. Remember the rule, no naked envelopes. I think it’s a law, or something. And you wouldn’t want to end up on the naughty list this close to Christmas…
So what do you think? Isn’t he/she cute? Lol, I’m not one to stir up controversy, but I did read that traditional portrayals of Santa’s reindeer, that still have antlers at Christmas, meant they had to be female. Apparently, males loose them by mid-December. Either way, I think the card is adorable! Isn’t it fun when you have an idea in your head, and it actually comes out better than you thought it would? Of course, the super cute Season’s Greetings Deer set sets you up for success. I mean, even in all one color, it would be cute. Ooh, now I’m thinking all white, or black silhouettes, or solid gold glitter…
Alright, your turn! If you make one, tag me on Instagram or Facebook so I can see! Thanks for stopping by today; I’ll be back tomorrow with another cool, interactive card you’re going to want to see. (I was on a streak!) See you then. Oh, and Happy Halloween!
This site uses affiliate links whenever possible (at no additional cost to you), but only for products I actually use and love.

This is quite simply one of the most adorable cards I’ve seen in a very long time. Bravo!
OMG I think this card is so endearing and eye-catching.